Mudjacking vs polyjacking: the real costs, cure times, and results in 2026
⏱️ 14 min read · Last updated: 2026
- Polyurethane foam (polyjacking) supports up to 14,000 lbs per square foot and is traffic-ready in 15 minutes, per Alchatek’s AP Lift 475 specs (2025).
- Mudjacking slurry requires 24–48 hours to cure before traffic use, compared to 15–30 minutes for polyjacking foam.
- Average cost for mudjacking is $3–$6 per square foot; polyjacking averages $5–$25 per square foot due to specialized materials.
- The polyurethane foam expands to 20–30 times its liquid volume within 15 seconds of injection, creating uniform lift pressure.
A mudjacking crew quoted my neighbor $1,900 to lift their front walkway. Two weeks later, the foam crew did the same job for $700 in under two hours. That price gap isn’t unusual, and the difference isn’t just about cost—it’s about the material under your concrete and how you plan to use that surface in the next decade.
Source: ncfi.com
The debate between mudjacking vs polyjacking in 2026 comes down to a trade-off: immediate savings versus long-term performance and convenience. I’ve overseen both methods on projects ranging from residential patios to light commercial slabs. The standard advice—”poly is better, just pay more”—misses critical details about your specific slab, soil, and budget. The right choice depends on variables most guides ignore.
How each method actually works (and the physics involved)
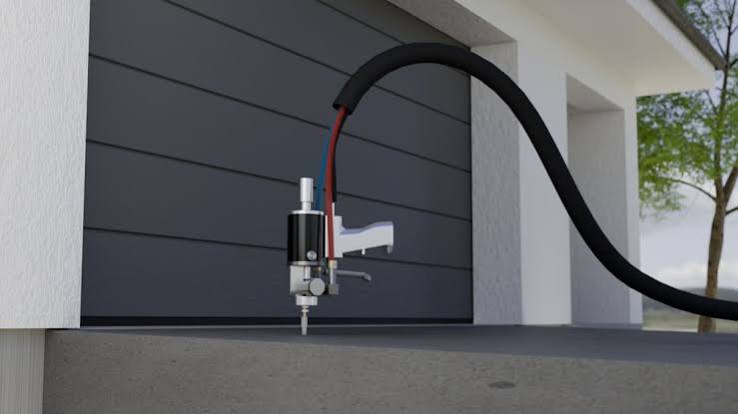
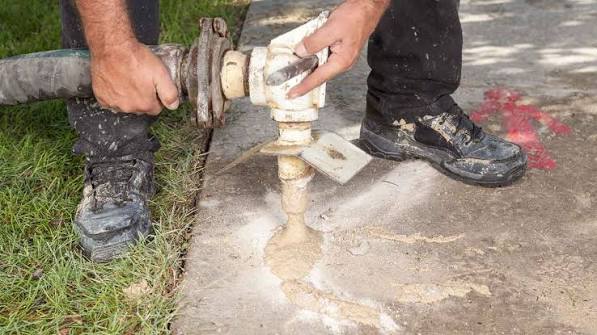
Mudjacking uses a cement-based slurry pumped under pressure through 1.5–2 inch holes to fill voids and lift the slab. Polyjacking injects a two-part polyurethane foam through tiny 5/8 inch holes; the foam expands to 20–30 times its liquid volume within 15 seconds, generating uniform lift pressure (Foundationcosts.com, 2026). The core difference isn’t just the material—it’s the expansion force and the permanence of the fill.
Think of mudjacking as filling a space with wet sand. It works by displacement and weight. Polyjacking works by controlled chemical expansion. The foam seeks out every void and micro-crack, creating a denser, more interconnected support structure beneath the concrete. This isn’t a subtle difference in theory; it shows up in long-term performance and in the minimal intrusion required to do the job.
Visual breakdown: what happens under the slab
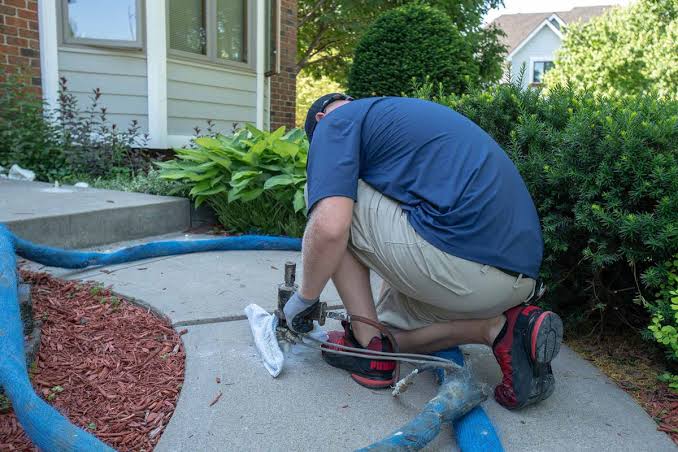
- Hole drilling: Mudjacking requires holes the size of a quarter (1.5–2″). Polyjacking holes are the diameter of a pencil (5/8″). The smaller hole means less surface damage and patching.
- Material injection: Mudjacking slurry flows and settles, primarily filling large voids. Polyurethane foam expands radially, filling both large cavities and hairline fractures the slurry cannot reach.
- Lift mechanism: Mudjacking relies on the pump’s pressure and the slurry’s weight to push the slab up. Polyjacking’s lift comes from the foam’s expansive force, which is more predictable and easier to control.
- Cure and harden: Slurry needs 24–48 hours to achieve load-bearing strength. Polyurethane foam reaches over 90% of its final strength in 15 minutes, allowing immediate foot and vehicle traffic.
The key here is the hole size. Notice how the polyjacking 5/8-inch hole is dramatically less invasive. This is what separates a discreet repair from one that leaves visible patch marks for years. For a high-traffic commercial slab or a front walkway you care about, that visual difference matters.
The true cost breakdown: materials, labor, and hidden fees
On paper, mudjacking costs $3–$6 per square foot, while polyjacking runs $5–$25 per square foot (Angi, 2026). That 3–5x price multiplier for foam is real, but it doesn’t tell the full story. The primary driver is material cost: polyurethane foam costs approximately 4–5 times more per unit than cement slurry (Liftright Concrete, 2023). Specialized equipment for foam injection also adds to the contractor’s overhead.
However, the “sticker price” comparison misses key financial factors. Mudjacking’s lower cost often comes with a shorter warranty (1–3 years) and a higher likelihood of needing repeat work if the underlying soil issue isn’t resolved. Polyjacking’s higher upfront cost frequently includes a 5–10 year warranty, reflecting its durability. Consider the total cost over 10 years, not just the day-of invoice.
| Factor | Mudjacking | Polyjacking |
|---|---|---|
| Average Cost | $3–$6 | $5–$25 |
| Material Cost | Lower (cement slurry) | 4–5x higher (polyurethane foam) |
| Typical Warranty | 1–3 years | 5–10 years |
| Potential Re-work Risk | Higher (slurry can wash away) | Lower (foam is waterproof) |
The timeline: from quote to cured slab in real hours
Polyjacking takes 15–30 minutes to cure and be ready for foot traffic, compared to 24–48 hours for mudjacking to set (NCFI, 2024). This is the most dramatic practical difference between the two methods. For a family with one main walkway or a business with a customer entrance, that 2-day vs. 30-minute gap is often the deciding factor.
The polyjacking process itself is often faster too. A typical residential driveway (400–600 sq ft) can be lifted and sealed in 2–3 hours. Mudjacking for the same area might take 3–4 hours, plus the mandatory overnight cure time. The total project timeline, from scheduling to full use, is significantly compressed with foam.
Step-by-step: what to expect on installation day
- Pre-job prep (both methods): Clear all vehicles, furniture, and obstacles from the slab. The crew needs clear access to every edge. What to check: Are drainage paths clear? What NOT to do: Don’t wash the slab the day before—you don’t want excess water in the work area.
- Hole placement (5-7 minutes): The contractor drills injection ports. For mudjacking, expect visible holes the size of a quarter. For polyjacking, pencil-sized holes are drilled in a strategic grid pattern.
- Material injection (1-3 hours): Crew pumps material while monitoring lift with a laser level. You’ll see the slab rise in real time. What to check: Are they using a level constantly? What NOT to do: Do not stand on the slab being lifted.
- Patching (10-20 minutes): Small holes are filled with a color-matched sealant. Polyjacking patches are nearly invisible. Mudjacking patches may remain visible as cement spots.
- Cure and load (immediate vs. delayed): For polyjacking, you can walk on it immediately and drive on it in 15–30 minutes. For mudjacking, mark off the area and allow 24–48 hours before any foot traffic.
“High-density polyurethane foam (AP Lift 475) is traffic-ready in 15 minutes after injection, while mudjacking slurry requires overnight curing before traffic use.” — Alchatek, 2025
Before vs. after: what a proper lift actually looks like
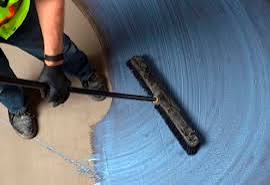
A successful lift, whether by mud or foam, results in a slab that is level, stable, and properly sloped for drainage. The visual difference between the methods is most apparent in the prep and finish. A correct polyjacking job leaves almost no trace of the repair. A mudjacking job, while effective, will leave a pattern of larger, patched cement spots.
Beyond cosmetics, inspect the drainage. The slab should slope away from your foundation at a rate of about 1/4 inch per foot. Use a level to check several points. A good contractor will adjust the lift to correct drainage issues, not just make it “flat.” This is a critical detail for preventing future water damage.
The four-point inspection checklist after the job is done
- Visual sweep: Look for unevenness at slab joints or where concrete meets your home’s foundation. A straight edge (like a 6-foot level) should lie flat across the surface with no significant gaps.
- Drainage check: Pour water on the slab near your foundation. It should flow away from the structure, not pool or run toward it.
- Stability test: Walk the entire perimeter and surface. There should be no bouncy or hollow spots, which indicate unfilled voids beneath.
- Patch inspection: For polyjacking, look for the tiny, sealed holes (5/8″). For mudjacking, check that the cement patches are smooth and won’t be a tripping hazard.
The detail everyone gets wrong about slab stability
The most common mistake isn’t choosing the wrong material—it’s not addressing the root cause of the sinking. Both mudjacking and polyjacking lift the slab, but if the soil beneath is compressible, prone to erosion, or poorly compacted, the problem will return. A proper diagnosis requires understanding why it sank in the first place.
Typical causes include: soil washout from poor drainage, expansive clay soils that shrink and swell, or simply inadequate initial compaction during construction. A knowledgeable contractor will assess this during their quote. If the soil is the issue, polyjacking foam can act as a semi-permanent stabilization agent in a way mud slurry cannot. The foam’s closed-cell structure is waterproof and doesn’t decompose.
The decision framework: 4 questions to ask your contractor
The mudjacking vs polyjacking choice isn’t universal. It depends on your slab, your soil, your budget, and your tolerance for downtime. Here is a framework to decide, which I’ve refined after seeing hundreds of projects. Use this to guide your conversation with contractors, not replace it.
Start by asking these four questions. Their answers will point you toward the method that fits your specific situation.
- “What is the cause of the sinking in my specific case?” If the answer is “voids from washout” and the soil is otherwise stable, mudjacking may suffice. If the soil is expansive or unstable, polyjacking offers better long-term stabilization.
- “How soon do I need full use of this surface?” If you need it back in an hour (for a business, or your only entrance), only polyjacking delivers. If it’s a secondary patio you can avoid for two days, mudjacking is viable.
- “What is the total cost, including warranty and potential re-lift?” Compare the 10-year cost. A $1,200 mudjack job with a 2-year warranty that fails in year 3 may cost more than a $1,800 polyjack job with a 10-year warranty.
- “Can you show me before-and-after photos of a similar project you completed over 5 years ago?” This tests their experience and the long-term results of their work. Real results are the best indicator.
To understand which method actually works for walkways specifically, our walkway leveling deep-dive breaks down the nuances. It’s also worth learning how long concrete leveling lasts to set realistic expectations. Timing matters—researching the best time of year for concrete leveling can affect cure times and pricing. Finally, proper preparation is key; follow our guide on how to prepare for a walkway leveling appointment to ensure a smooth process.
- Polyjacking cures in minutes; mudjacking takes 1–2 days to be ready for traffic.
- Polyjacking costs 3–5x more per square foot but typically carries a 5–10 year warranty vs. mudjacking’s 1–3 years.
- For sinking caused by unstable soil, polyjacking foam provides better long-term stabilization than cement slurry.
Common questions about mudjacking vs polyjacking
Can polyjacking lift a slab that has sunk more than 2 inches?
Yes, polyjacking can lift slabs sunk significantly more than 2 inches. The foam’s expansion force is powerful and controllable. However, a slab with extreme settlement (over 3–4 inches) may have underlying structural damage or broken sections that need full replacement, not just leveling.
Will the smaller polyjacking holes affect my slab’s strength?
No, the 5/8-inch holes drilled for polyjacking do not compromise the slab’s structural integrity. They are small, strategically placed, and immediately sealed with a durable, color-matched sealant that protects the concrete.
Why is mudjacking so much cheaper than polyjacking?
The primary cost driver is material. Cement slurry used in mudjacking is an inexpensive, readily available mixture. Polyurethane foam is an engineered chemical product that costs 4–5 times more per unit, and the injection equipment is specialized and expensive, adding to the contractor’s overhead.
How long does a mudjacking repair last compared to polyjacking?
A mudjacking repair typically lasts 5–7 years if the cause of sinking is resolved, with many contractors offering a 1–3 year warranty. Polyjacking repairs often last 15+ years because the foam is waterproof and inert, with typical warranties of 5–10 years.
Can I do either method myself as a DIY project?
It is strongly not recommended. Both methods require specialized equipment, knowledge of soil mechanics, and experience to avoid over-lifting and cracking the slab. Improper injection can cause severe, costly damage. This is a job for licensed professionals.
The bottom line
For a typical homeowner in 2026 with a sinking walkway or driveway, polyjacking is the superior investment for most scenarios. The 15-minute cure time, minimal invasiveness, and long-term warranty outweigh the higher initial cost. Choose mudjacking only if you have a strict, immediate budget limit, the slab is in a low-visibility area, and you can tolerate 1–2 days of restricted access.
Your next step is concrete: contact two contractors—one who specializes in mudjacking and one in polyjacking—and ask them the four diagnostic questions from the decision framework above. Compare not just their price per square foot, but their answer to the cause of the sinking and the length of their warranty. That conversation will give you the clarity to choose correctly for your specific slab.
See also: walkway leveling
See also: how long does concrete leveling last
See also: how to prepare for walkway leveling appointment
Related: polyjacking vs mudjacking for clay soil
Related: polyjacking vs mudjacking for freeze-thaw climates
Related: polyurethane foam injection pros and cons