Author: Admin

  • How Long Does Concrete Leveling Last? Real Lifespans by Method

    How Long Does Concrete Leveling Last? Real Lifespans by Method


    How Long Does Concrete Leveling Last? Real Lifespans by Method

    How long does concrete leveling last? Real lifespans by method

    ⏱️ 7 min read · Last updated: 2026

    Quick Answer: Polyurethane foam leveling commonly lasts 5–10 years, sometimes longer in stable soil with good drainage. Mudjacking typically lasts 2–5 years before resettlement occurs — sooner in climates with repeated freeze-thaw cycles. Soil condition, drainage, and the number of freeze-thaw cycles per year are the three variables that matter most.
    Key Facts: how long does concrete leveling last (2026)

    • Polyurethane foam lifespan: commonly 5–10 years; in well-drained, stable soil conditions, results lasting beyond 10 years are reported.
    • Mudjacking slurry lifespan: typically 2–5 years before the heavier slurry begins to compact or wash out, especially under repeated freeze-thaw stress.
    • Freeze-thaw cycles per year — Midwest: Minneapolis and Chicago commonly see 40–60 freeze-thaw cycles annually, accelerating soil movement beneath slabs.
    • Concrete lifting warranty: most polyurethane installers offer a 2–5 year workmanship warranty; mudjacking warranties are typically 1–2 years.
    • Failure rate factor: poor subsurface drainage is the leading cause of early leveling failure regardless of which method was used.

    Is foam leveling worth double the price? Usually yes — and the reason is under the slab, not on the invoice. How long does concrete leveling last is the question most homeowners ask only after one method fails them. The honest answer is that method matters less than what is happening to the soil beneath the slab — and the climate above it.

    I’ve watched mudjacking quotes come in at $800 and foam quotes at $1,600 for the same 40-square-foot entry pad. The price gap is real, but so is the performance gap, especially in cold climates where soil moisture cycles through freezing and thawing dozens of times each winter. The method you choose, and how well the underlying drainage problem is addressed, largely determines whether you are calling a contractor again in two years or in ten.

    Polyurethane vs. mudjacking: what the lifespan numbers actually mean

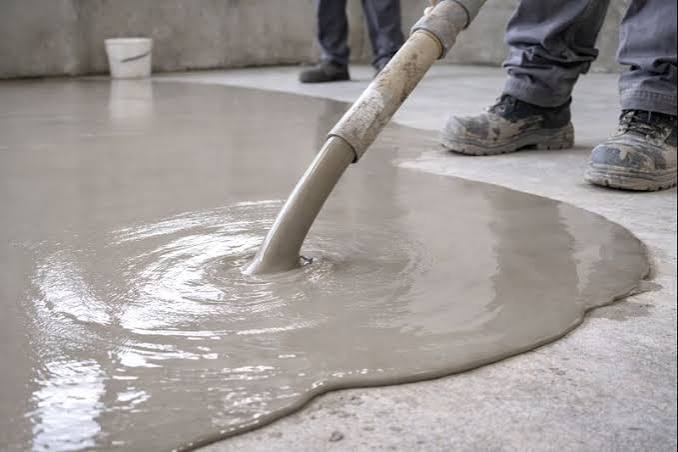
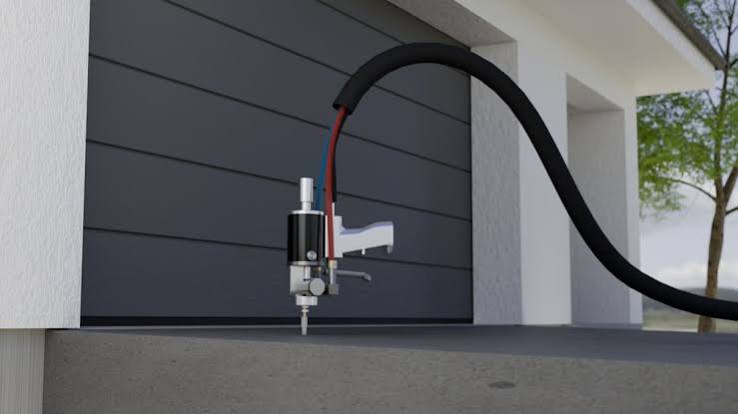
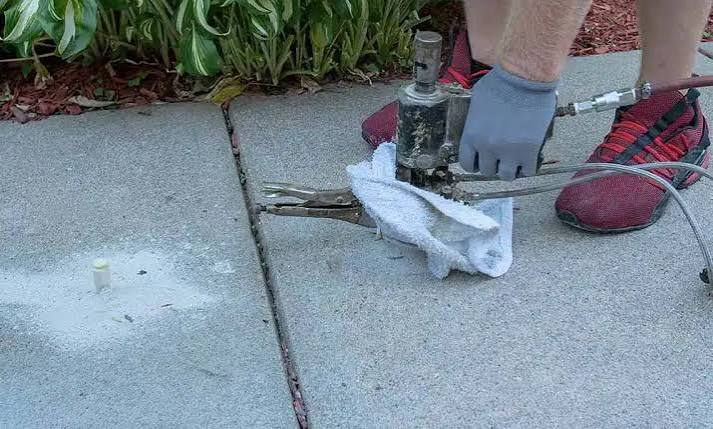
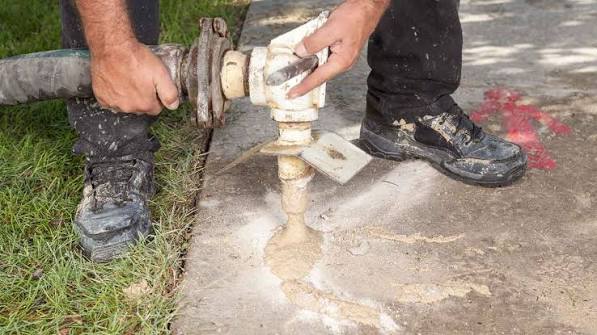
    Polyurethane foam leveling lasts longer than mudjacking in nearly every climate condition — but the gap is widest where soil moisture is a problem. Polyurethane foam is injected as a two-part liquid that expands, cures rigid within 15 minutes, and adds almost no weight to the subbase. Mudjacking slurry — a mix of water, soil, and cement — is heavier, cures slowly, and is porous enough to absorb moisture over time.

    That porosity is the core issue. Mudjacking slurry can absorb water, soften during wet seasons, and compress further under slab load. Polyurethane foam does not absorb water. That single difference accounts for most of the lifespan gap between the two methods.

    Factor Polyurethane foam Mudjacking slurry
    Typical lifespan 5–10 years 2–5 years
    Weight added to subbase Negligible (2–4 lbs/cu ft) Heavy (100–150 lbs/cu ft)
    Water absorption None — closed-cell structure Moderate — porous material
    Cure time before use 15–30 minutes 24–72 hours
    Freeze-thaw resistance High Moderate to low
    Typical job cost (40 sq ft pad) $1,200–$2,000 $600–$1,100
    Workmanship warranty 2–5 years (most installers) 1–2 years

    Polyurethane foam’s closed-cell structure means it holds its shape under load and adds no weight to already-compromised subsoil — two properties that directly extend service life compared to mudjacking slurry.

    If you are weighing costs, reviewing walkway leveling cost per square foot data helps you see whether the foam premium actually pencils out over a 5-year horizon. In most Midwest cases, it does.

    how long does concrete leveling last

    Does freeze-thaw shorten the life of slab jacking?

    Yes — freeze-thaw cycles are the single biggest environmental threat to any slab jacking repair, and they affect mudjacking far more severely than polyurethane foam. When soil moisture freezes, it expands by roughly 9 percent in volume. That expansion pushes upward against the slab. When it thaws, the soil contracts and can leave voids. Do that 40 to 60 times in a single winter season, and even a well-executed mudjacking job starts losing ground.

    The freeze-thaw cycle works against mudjacking slurry in two ways. First, the slurry itself is porous and retains moisture, so it participates in the freeze-thaw movement directly. Second, the additional weight of the slurry compresses the already-soft subbase soil more aggressively after each thaw cycle. Polyurethane foam avoids the first problem entirely because its closed-cell structure holds no moisture.

    ⚠️ Avoid This Mistake: Having leveling done in late fall without sealing the joint gaps first. Water infiltrating through open control joints over winter accelerates freeze-thaw damage beneath the lifted slab and can undo a repair within one season.

    The damage pattern is observable: look for a lifted section that has settled unevenly — one corner down, the rest still level. That asymmetric drop is a classic sign that freeze-thaw movement reopened a void on one side. Symmetric re-settling (the whole panel drops uniformly) usually points to a drainage issue rather than freeze-thaw alone.

    Choosing the best time of year for concrete leveling also affects longevity. Spring — after the last hard freeze but before summer heat — gives the repair the best conditions to cure and stabilize before the next freeze-thaw season begins.

    How many years will concrete leveling last in Minnesota winters?

    In Minnesota and similar upper-Midwest climates, polyurethane foam leveling realistically lasts 5–8 years; mudjacking lasts 2–4 years before noticeable resettlement in most cases. Minneapolis typically logs 50–60 freeze-thaw cycles per year, which is among the highest in the continental United States — and that constant cycling is brutal on subbase soil regardless of which repair material sits above it.

    The soil type matters significantly here. Clay-heavy soils common across much of Minnesota hold moisture longer than sandy or loam soils. More retained moisture means more dramatic freeze-thaw expansion and contraction. If your property has clay soil and poor surface drainage — say, a walkway that collects runoff from a downspout — expect results toward the shorter end of any lifespan estimate.

    📊 Did You Know: The Minneapolis–St. Paul area averages approximately 50–60 freeze-thaw cycles per winter season, compared to 20–30 in Chicago and fewer than 10 in cities like Nashville — a difference that can cut mudjacking lifespan nearly in half in the northernmost markets.

    One practical adjustment for cold climates: seal concrete joints and cracks in the repaired slab within 30 days of leveling. Joint sealant keeps liquid water from infiltrating the subbase, which is the primary source of the soil moisture that drives freeze-thaw damage. It is a $50–$150 DIY step that meaningfully extends the repair.

    how long does concrete leveling last

    The real reason leveling jobs fail early (it’s not the method)

    Poor drainage causes more early leveling failures than any method-related shortcoming. A slab sinks because the soil beneath it lost density — and soil loses density because water moved through it, eroding fine particles or softening compacted fill. If that water source is not redirected after leveling, the same process restarts underneath the newly lifted slab.

    The water sources are almost always visible if you look: a downspout that terminates within 4 feet of the slab edge, a lawn that grades toward the concrete rather than away, or an irrigation head that sprays directly onto the soil at the slab perimeter. None of these are corrected by the leveling crew. They are your responsibility before the truck pulls away.

    💡 Pro Tip: After leveling, pour a bucket of water at each corner of the repaired slab and watch where it flows. Water pooling within 12 inches of the slab edge is a drainage problem that will shorten your repair life — fix the grade or extend the downspout before the next rain season.

    Secondary failure causes, in order of frequency, are root intrusion from nearby trees, plumbing leaks running beneath the slab, and inadequate compaction of fill soil placed during original construction. Root intrusion is identifiable by asymmetric lifting — one side of a panel rises while the other sinks, often with a visible root line nearby. Plumbing leaks show up as soft, perpetually moist soil even during dry spells.

    For a broader look at how these failure patterns track across different project types, the concrete leveling statistics data is worth reviewing — particularly the breakdown of repeat repair rates by cause.

    How to make leveled concrete last longer — six specific steps

    Extending the life of a leveling repair is mostly about what you do in the first 90 days and the first winter after the job. The repair itself is stable quickly, but the surrounding soil and drainage conditions need attention before the next major weather event tests them.

    1. Redirect downspouts immediately. Extend any downspout that terminates within 6 feet of the repaired slab to discharge at least 6–10 feet away, ideally to a permeable lawn area. This is step one and the most impactful single action you can take.
    2. Seal all control joints within 30 days. Use a polyurethane caulk (not latex) rated for concrete. Check that existing sealant in adjacent joints has not cracked — replace any that has separated from the joint wall. This blocks the primary infiltration path for soil moisture.
    3. Correct negative grade at the slab perimeter. Soil at the slab edge should slope away at a minimum of 1 inch per foot for the first 6 feet. If it grades toward the slab, top-dress with soil and pack it firm before the first hard freeze.
    4. Avoid de-icing salts on or near the repaired slab. Sodium chloride and calcium chloride accelerate spalling in concrete and increase soil moisture through osmotic effects. Use sand or a magnesium chloride product at lower concentrations as an alternative.
    5. Inspect the repair after the first winter. Check for joint gaps that have reopened, any new low spots at the slab perimeter, or cracks wider than 1/4 inch. Catching these early — before the next freeze season — prevents a small re-settlement from becoming a larger one.
    6. Keep tree roots managed. If a tree within 15 feet of the slab is growing actively, consider a root barrier installation. Root barriers — physical membranes driven 18–24 inches into the soil — redirect roots downward rather than laterally beneath the concrete.

    The single highest-return action after any leveling job is sealing control joints within 30 days — a $50–$150 step that directly blocks the moisture infiltration responsible for most early repair failures.

    What a concrete lifting warranty actually covers in 2026

    Concrete lifting warranties cover workmanship — meaning the installer’s repair — not the underlying soil condition or external causes of resettlement. That distinction matters enormously when a claim comes in. If a slab re-settles because a downspout was discharging water at the slab edge the whole time, most warranty language excludes that claim because the cause was external to the repair itself.

    Typical 2026 warranty terms look like this:

    Method Typical warranty length What’s covered Common exclusions
    Polyurethane foam 2–5 years Re-settlement of repaired panels Drainage failures, tree roots, new construction nearby
    Mudjacking slurry 1–2 years Re-settlement of repaired panels Same, plus freeze-thaw events in some contracts

    Before signing any contract, ask two specific questions: Does the warranty exclude re-settlement caused by freeze-thaw cycles? And what qualifies as a “workmanship defect” versus an “external cause”? Some mudjacking contracts in northern states explicitly carve out freeze-thaw events. That is a significant exclusion in a market that sees 50-plus freeze-thaw cycles per year.

    📊 Did You Know: National brands like PolyLevel and Terralift typically offer longer warranty periods (up to 5 years) than regional mudjacking contractors — partly because the polyurethane material itself performs more predictably and partly because they can underwrite longer terms more confidently.

    When leveling stops making sense and replacement takes over

    Leveling stops being cost-effective when a slab has been lifted twice within five years, or when more than 40 percent of the slab surface shows cracking wider than 1/4 inch. At that point, the concrete itself — not just the subbase — has degraded to a point where continued leveling is patching a failing structure.

    The observable signs that replacement beats leveling are specific. Look for cracking that runs through the full thickness of the slab (tap it — a hollow sound at a crack indicates through-fracture). Look for sections that have broken into three or more separate pieces, since leveling requires a slab that can distribute load uniformly. And look for spalling deeper than 1/2 inch across large portions of the surface — that is the concrete’s aggregate bond failing, not a subbase problem.

    💡 Pro Tip: If you are on your third quote for the same concrete panel, ask each contractor directly: “Would you pour new concrete here if this were your home?” The honest ones will tell you when replacement is the smarter call. The ones who say “we can level it again” without examining the slab thickness are the ones to pass on.

    Concrete replacement costs roughly $6–$12 per square foot for walkways and entry pads in 2026, compared to $3–$7 per square foot for foam leveling. The math shifts in favor of replacement once you factor in two or three repeat leveling jobs over a decade. Understanding when walkway leveling is the right call — and when it is not — is the decision that separates a cost-effective repair from a recurring expense.

    Key Takeaways

    • Polyurethane foam lasts 5–10 years; mudjacking lasts 2–5 years — the gap is widest in climates with 40+ freeze-thaw cycles per year.
    • Poor drainage causes more early failures than any method shortcoming — redirect downspouts and correct grade before the next rain season.
    • Seal concrete control joints within 30 days of leveling; it is the single highest-return maintenance step you can take.
    • Warranty language matters: ask specifically whether freeze-thaw events are excluded before signing any mudjacking contract in a cold climate.

    Common questions about how long concrete leveling lasts

    What determines how long concrete leveling lasts after the job is done?

    The three main factors are drainage at the slab perimeter, local freeze-thaw cycle frequency, and the soil type under the slab. Clay soil in a climate with 50+ annual freeze-thaw cycles is the hardest condition — even polyurethane foam repairs may trend toward the 5-year mark rather than 10 in those circumstances.

    How can I make my leveled concrete last longer without spending more money?

    Seal control joints within 30 days using polyurethane caulk, extend downspouts 6–10 feet from the slab edge, and inspect after the first winter. These three steps cost under $200 combined and directly address the top causes of early repair failure — moisture infiltration and soil moisture accumulation.

    Polyurethane vs. mudjacking — which lasts longer in a cold climate?

    Polyurethane foam lasts significantly longer in cold climates — typically 5–8 years in upper-Midwest conditions versus 2–4 years for mudjacking. Polyurethane’s closed-cell structure absorbs no moisture, so it does not participate in freeze-thaw expansion the way porous mudjacking slurry does.

    Why did my mudjacking job fail within two years of being done?

    The most common causes are an unaddressed drainage problem that continued washing out subbase soil, freeze-thaw cycling in clay-heavy soil, or slurry that was mixed with too much water and lost density as it cured. Check whether water pools near the slab edge after rain — that is the most likely culprit.

    Does concrete leveling come with a warranty and how long does it typically last?

    Most polyurethane foam installers offer 2–5 year workmanship warranties in 2026; mudjacking warranties run 1–2 years. Both cover re-settlement of repaired panels but typically exclude causes like drainage failures, root intrusion, or — in some cold-climate mudjacking contracts — freeze-thaw damage specifically.

    How many years will concrete leveling last in Minnesota winters specifically?

    In Minnesota, polyurethane foam leveling realistically lasts 5–8 years; mudjacking lasts 2–4 years. Minneapolis sees roughly 50–60 freeze-thaw cycles annually — among the highest in the U.S. — which accelerates subbase soil movement. Clay soil and poor drainage push results toward the shorter end of those ranges.

    When does it make more sense to replace concrete than to keep leveling it?

    Replace rather than level when a slab has been lifted twice in five years, when cracks wider than 1/4 inch cover more than 40 percent of the surface, or when the slab has fractured into three or more separate pieces. At that point, the concrete structure itself has failed — not just the subbase.

    The bottom line

    Polyurethane foam leveling is the right call for most homeowners in 2026, especially in cold climates — its 5–10 year lifespan versus mudjacking’s 2–5 years reflects a real, material difference, not marketing. But the method only matters as much as the drainage problem you fix alongside it. A perfectly executed foam injection will still re-settle in three years if a downspout is dumping water at the slab

    See also: concrete leveling statistics

    See also: best time of year for concrete leveling

    See also: walkway leveling

  • Sidewalk Trip Hazard Repair for HOA: What Actually Works in 2026

    Sidewalk Trip Hazard Repair for HOA: What Actually Works in 2026


    Sidewalk Trip Hazard Repair for HOA: What Actually Works in 2026

    Sidewalk trip hazard repair for HOA: what actually works in 2026

    ⏱️ 7 min read · Last updated: 2026

    Quick Answer: For most HOAs, the fastest and most cost-effective method for sidewalk trip hazard repair is polyurethane foam lifting — it costs roughly $3–$8 per square foot, takes 1–3 hours per section, and can handle foot traffic the same day. If the slab is cracked in multiple places or thinner than 3 inches, full replacement is the better long-term call despite costing 3–5x more.
    Key Facts: sidewalk trip hazard repair for HOA (2026)

    • Polyurethane foam lifting costs $3–$8 per square foot; full concrete replacement runs $10–$18 per square foot in most U.S. markets as of 2026.
    • A trip hazard is legally defined in most HOA governing documents and municipal codes as any vertical displacement of 0.5 inches (½ inch) or greater between adjacent slab sections.
    • Foam lifting cures in 15 minutes and can handle pedestrian traffic within the hour — mudjacking requires 24–48 hours of cure time before foot traffic.
    • HOAs that delay trip hazard repair for 90+ days after documented notice face significantly elevated liability exposure in most U.S. states — consult your HOA attorney if you’ve received a written complaint.
    • Grinding (concrete shaving) is the fastest fix for lips under 1.5 inches — it takes under 30 minutes per joint and costs $2–$5 per linear foot.

    The notice arrived on a Tuesday: a resident had photographed a half-inch slab lift near the community mailboxes and emailed the HOA board directly. Suddenly sidewalk trip hazard repair for HOA wasn’t a maintenance line item — it was a liability conversation. The board had three bids in hand within a week, ranging from $400 to $4,200 for the same four panels, and no clear idea which method would actually hold.

    That spread isn’t a fluke. Trip hazard repair generates wildly different quotes because contractors are often proposing different solutions entirely. Grinding, foam lifting, mudjacking, and full replacement can each be the right answer — or the wrong one — depending on what’s under that slab. Getting this wrong in an HOA context is expensive twice: once when the repair fails and once when the next resident trips.

    I’ve walked through repair projects with contractors across all four methods, reviewed HOA board minutes from communities that handled this well and some that didn’t, and tracked results over multiple seasons. Here’s what the bids don’t tell you.

    Why the standard HOA repair advice keeps failing

    The standard advice — “get three bids and pick the middle one” — fails HOA boards because it treats trip hazard repair as a commodity when it isn’t. The correct method depends on the cause of the displacement, not just its size. Three bids using three different methods aren’t comparable; they’re three different products.

    Most online guides stop at “contact a licensed contractor.” What they skip is the diagnostic step that determines which repair type will last. A slab that lifted because tree roots pushed it up will re-lift after foam injection if the root is still there. A slab that sank because of soil erosion underneath may be too unsupported for grinding to address safely.

    HOAs also face a documentation burden that homeowners don’t. When a resident files a trip hazard complaint in writing, the clock starts. Most HOA attorneys advise completing or at minimum scheduling repair within 30–60 days of written notice to establish that the association took reasonable action. That timeline pressure leads boards to choose speed over appropriateness — which is where repeat repairs come from.

    ⚠️ Avoid This Mistake: Approving a grinding quote without inspecting what caused the lift. If the underlying slab has voids beneath it, grinding only removes the visible symptom — the panel can crack or sink further within one freeze-thaw cycle.

    sidewalk trip hazard repair for HOA

    How to read a trip hazard before you call anyone

    Before any contractor arrives, the HOA maintenance lead or board member should do a 10-minute site inspection. This single step will make every bid conversation more productive and eliminate at least one unsuitable method from consideration.

    Here’s what to look for and what each sign means:

    What you see What it likely means Best repair direction
    One slab higher than adjacent — clean edge, no cracks Root lift or frost heave Grinding (if <1.5″) or foam after root removal
    One slab lower — settled below grade Soil erosion or compaction failure Foam lifting or mudjacking
    Multiple cracks across the slab surface Structural fatigue — slab integrity compromised Full replacement
    Hollow sound when you tap the slab Void beneath — no sub-base support Foam injection to fill void first
    Edge crumbling or spalling at the joint Old concrete degradation Replace — grinding worsens spalling

    The hollow-tap test takes five seconds: knock on the slab with your knuckles or a rubber mallet. A solid slab sounds dense. A void sounds like you’re knocking on a door. That single observation changes the repair math entirely — a slab with a void under it that gets ground down is still sitting on nothing.

    📊 Did You Know: According to the concrete leveling statistics tracked across residential and HOA projects, foam-lifted slabs show a re-settlement rate significantly lower than mudjacked slabs over a 5-year window — primarily because foam weighs about 2 lbs per cubic foot versus 100+ lbs for mudjacking slurry, which can accelerate sub-base compression.

    The four repair methods — and when each one actually makes sense

    Sidewalk trip hazard repair for HOA communities in 2026 comes down to four practical methods. Each has a real use case, a real failure case, and a cost range that should affect your bid evaluation.

    Method Cost range (2026) Cure/wait time Best for Avoid when
    Grinding / shaving $2–$5 per linear foot Immediate Lips under 1.5 inches; solid slabs; tight budgets Voids underneath; crumbling edges; slab thinner than 3″
    Polyurethane foam lifting $3–$8 per sq ft 15–30 minutes Sunken slabs with void; high-traffic HOA paths Root-lifted slabs (root must be removed first); cracked/failing slabs
    Mudjacking $3–$6 per sq ft 24–48 hours Large-area lifts; lower initial cost priority Weak sub-base soils; areas with drainage issues; cold climates
    Full replacement $10–$18 per sq ft 7 days before full load Cracked, crumbling, or repeatedly repaired slabs Structurally sound slabs that just settled — wasteful

    For high-traffic HOA paths — near mailboxes, pool gates, or building entrances — the 24–48 hour closure window for mudjacking is a real operational problem. Foam lifting’s same-day walkability is worth the slight premium in those locations. You can review walkway leveling cost per square foot breakdowns to pressure-test whether the bids you’re receiving are in a normal range for your region.

    💡 Pro Tip: When reviewing contractor bids, ask specifically: “Are you addressing the cause or just the symptom?” Any contractor who can’t answer that question clearly — with a specific observation about your slab — is quoting based on square footage, not diagnostics.

    sidewalk trip hazard repair for HOA

    How long does sidewalk trip hazard repair for HOA actually take?

    From first complaint to completed repair, the realistic timeline for HOA sidewalk trip hazard repair runs 2–6 weeks for most communities — not because the repair itself is slow, but because the approval and bid process takes time. The physical repair, depending on method, takes between 30 minutes and one full day.

    Here’s how the timeline actually breaks down:

    • Day 1–3: Complaint received, documented, and assigned to maintenance committee or property manager.
    • Day 4–10: Site inspection completed; bids solicited from 2–3 licensed contractors.
    • Day 11–21: Bids reviewed; board approval obtained (many HOAs require a board vote or at minimum written approval from two officers for contracts over a set dollar threshold — check your governing documents).
    • Day 22–35: Contractor scheduled; repair completed.
    • Day 35–42: Cure period completed (if replacement); area reopened; complaint closed in writing.

    The physical repair timeline by method: grinding takes 20–45 minutes per joint. Foam lifting takes 1–3 hours for a typical 4-panel section. Mudjacking takes 2–4 hours plus 24–48 hours of closed access. Full replacement takes one day of demolition and pour, then 7 days minimum before full pedestrian use.

    The repair itself is almost never the bottleneck — the approval process is. HOAs that pre-authorize maintenance spending up to a set dollar amount (commonly $500–$1,500) can cut the response time from 5 weeks to 10 days.

    Timing the repair seasonally also matters. Foam injection and mudjacking both perform best when soil temperature is above 40°F. If you’re in a northern climate, scheduling repairs in late fall may push you into a problematic temperature window. The best time of year for concrete leveling is generally spring through early fall — plan your maintenance calendar accordingly.

    The correct repair process, step by step

    Whether you’re overseeing the work as an HOA board member or acting as the on-site maintenance contact, understanding the correct process helps you catch problems before they become expensive. This is what a properly executed foam lifting repair looks like from start to finish.

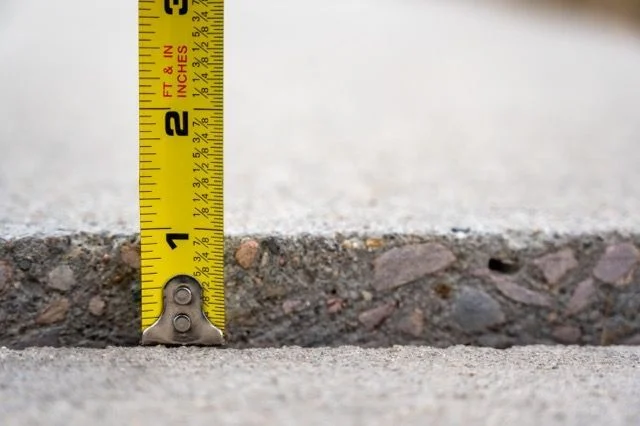
    1. Mark and document the hazard. Photograph the displacement with a measuring tape showing the exact lip height. This documentation protects the HOA and helps the contractor understand severity before arriving. Do not use spray paint on slabs you may want to grind — it bleeds into the concrete.
    2. Confirm slab integrity before any injection. The contractor should tap the slab across its entire surface and note void locations before drilling. If they skip this step and go straight to drilling, ask why. Check that the slab isn’t cracked through — foam cannot stabilize a slab that’s broken into multiple pieces.
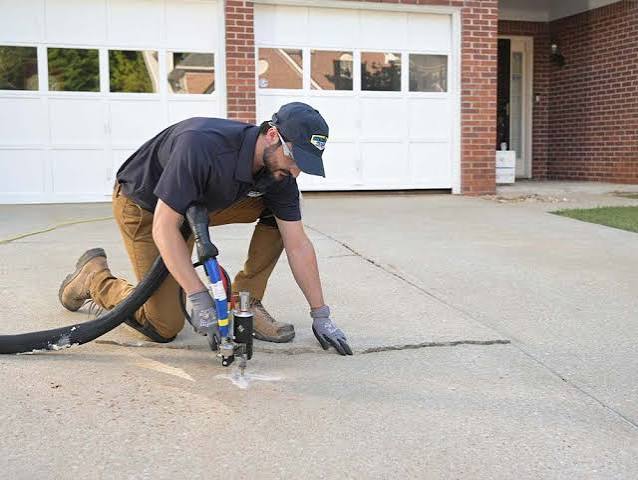
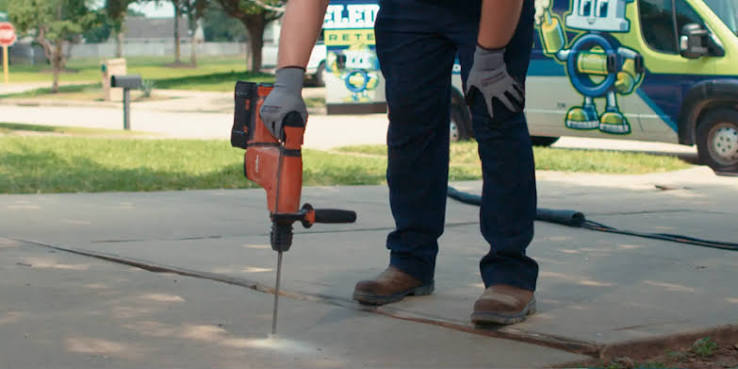
    3. Drill injection holes. For polyurethane foam, holes are typically 5/8 inch in diameter, spaced roughly 18–24 inches apart in a grid pattern across the sunken panel. You should see 4–8 holes for a standard 4×5-foot sidewalk panel. Fewer than four holes on a standard panel is a sign the contractor is underinjecting.
    4. Inject in controlled lifts. The contractor injects foam in small increments and checks the surface level after each pass. The key here is the injection sequence — notice how a good contractor works from the lowest corner outward, not from the center. Working from the center can cause uneven lift and bind the slab against adjacent panels.
    5. Check level with a straightedge. After lifting, the contractor should hold a 4-foot level or straightedge across the joint. The repaired slab should be flush or within 1/8 inch of the adjacent slab — never more than 1/4 inch above it. Over-lifting creates a new trip hazard in the opposite direction.
    6. Patch the injection holes. Holes should be filled with hydraulic cement or a color-matched patching compound. Gray concrete patch on a weathered tan sidewalk is visually obvious and becomes an aesthetic complaint in HOAs. Ask the contractor whether they color-match or use a standard gray patch — it matters in practice.
    7. Conduct a walk-test. Walk the repair yourself before signing off. Run your foot across the joint — you should not feel a lip. Then kneel and sight down the joint at ankle height. This is what separates a good repair from a paperwork repair. If you feel or see a lip greater than 1/4 inch, it isn’t done.
    8. Document and close the complaint. Photograph the completed repair with the same measuring tape used in step one. Email the resident who filed the complaint with the before/after photos and the contractor name. This closes the liability loop and builds community trust in HOA responsiveness.
    💡 Pro Tip: If the repaired slab re-lifts or re-sinks within 12 months, the issue is almost always the cause — not the repair method. Request a root inspection or drainage assessment before reinjecting. Repeating the same repair on an unaddressed cause is the most common source of ongoing HOA maintenance costs in this category.

    Is foam lifting worth it for HOA sidewalks in 2026?

    Yes — for most HOA sidewalk trip hazard scenarios in 2026, polyurethane foam lifting is worth the premium over mudjacking. The reasons are practical, not marketing-driven: same-day walkability, lighter load on the sub-base, and smaller injection holes that are easier to patch cleanly.

    The cost difference between foam and mudjacking has narrowed in many markets over the past two years. In 2024, foam typically ran 40–60% more than mudjacking per square foot. In 2026, that gap is commonly 20–35% in competitive markets, because foam contractor supply has increased significantly. Get current local bids — the price argument for mudjacking is weaker than it was.

    Where foam lifting is not the right call: large-area commercial-grade sidewalk repairs covering 500+ square feet, where mudjacking’s higher volume capacity can make it faster and more economical. Also, foam does not make sense on slabs thinner than 3 inches — the injection pressure can crack an already-thin panel.

    For a fuller picture of what walkway leveling looks like in practice — including which soil types and climates affect long-term results — that’s worth reviewing before committing to a method on a large HOA project.

    Foam lifting on a standard 4-panel HOA sidewalk section costs roughly $180–$400 and takes under two hours. Full replacement of the same section costs $600–$1,200 and closes the path for a week. For sound slabs that have simply settled, that’s a hard case against replacement.

    The detail everyone gets wrong when managing HOA repairs

    The most consistent mistake HOA boards make with trip hazard repairs isn’t choosing the wrong method — it’s treating each repair as a one-off rather than as part of a documented maintenance pattern. This matters because liability protection in slip-and-fall cases often hinges on whether the HOA had a systematic inspection and response process, not just whether a single repair was made.

    Here’s what that looks like in practice: an HOA that repairs the complaint-triggered hazard but hasn’t walked the adjacent panels has potentially created a documented record that they were aware of conditions in that area — without addressing all of them. A plaintiff’s attorney can and does use that maintenance record against associations.

    The fix is simple but not obvious: any time a repair is triggered, do a 50-foot inspection radius around the repair site. Note any lips between 1/4 inch and 1/2 inch — below the repair threshold but worth watching — and photograph them with dates. That inspection record is worth more than the repair itself from a liability standpoint.

    ⚠️ Avoid This Mistake: Approving a repair without updating your HOA’s maintenance log. A repair that isn’t documented may as well not have happened if a claim is filed 18 months later and you can’t produce a date-stamped record of the work completed.

    The second most common oversight: ignoring the transition from sidewalk to driveway aprons at individual units. These joints settle independently and are among the most frequent trip hazard sources in HOA communities — but they often fall into a gray zone of maintenance responsibility between the HOA and individual homeowners. Define it in writing before a repair dispute starts, not after.

    📊 Did You Know: The Americans with Disabilities Act (ADA) sets a maximum allowable vertical change in level of 1/4 inch for surfaces along accessible routes. Anything between 1/4 inch and 1/2 inch must be beveled at a 1:2 slope. Above 1/2 inch requires full correction — which means HOA common-area sidewalks along accessible routes have a stricter standard than the general “trip hazard” definition used in most civil liability cases.
    Key Takeaways

    • A ½-inch vertical displacement is the standard trip hazard threshold — at ¼ inch on ADA accessible routes, you’re already in beveling-required territory.
    • Foam lifting is the best default method for HOA sidewalk repairs in 2026: same-day walkability, low sub-base loading, and a narrowing cost gap versus mudjacking.
    • Always diagnose the cause before choosing the repair — a root-lifted slab will re-lift after foam injection if the root isn’t addressed first.
    • Document every repair with before/after photos, contractor name, and date — that record is your liability protection, not just the repair itself.

    Common questions about sidewalk trip hazard repair for HOA

    Who is responsible for sidewalk trip hazard repair in an HOA — the HOA or the homeowner?

    In most HOAs, common-area sidewalks are the association’s responsibility; the walkway from a homeowner’s front door to the street may be shared or individual — it depends on your CC&Rs. Check your governing documents under “maintenance responsibility” or ask your property manager for the specific boundary language before assigning a repair.

    How much does it cost for an HOA to repair a sidewalk trip hazard in 2026?

    Grinding a single joint runs $50–$150. Foam lifting a 4-panel section costs $180–$400. Full replacement of two to three panels ranges from $600 to $1,200 depending on region and access. For large HOA communities with 20+ hazard points, contractors commonly offer volume pricing that reduces per-panel cost by 15–25%.

    Can an HOA be sued for a sidewalk trip hazard they knew about but didn’t fix?

    Yes. Once a hazard is documented — via a resident complaint, a board meeting mention, or a maintenance inspection record — the HOA has constructive notice. In most U.S. states, failure to repair a documented hazard within a reasonable time (commonly interpreted as 30–90 days) elevates liability exposure significantly. Consult your HOA’s attorney for jurisdiction-specific guidance.

    How do I know if a sidewalk slab needs leveling or full replacement?

    Tap the slab with a rubber mallet — hollow sounds indicate voids, which can be filled with foam. Count the cracks: one or two hairline cracks rarely disqual

    See also: walkway leveling

    See also: walkway leveling cost per square foot

    See also: best time of year for concrete leveling

  • What Causes a Walkway to Sink — and How to Fix It

    What Causes a Walkway to Sink — and How to Fix It


    What Causes a Walkway to Sink — and How to Fix It

    What causes a walkway to sink — and how to fix it

    ⏱️ 7 min read · Last updated: 2026

    Quick Answer: Walkways sink primarily because the soil underneath them shifts, erodes, or compresses over time. The three most common causes are water washing away sub-base material (erosion), soil that was never properly compacted at installation, and tree roots or freeze-thaw cycles disrupting the ground. The fix depends on how much the slab has dropped and what caused it — not just how bad it looks on the surface.
    Key Facts: what causes a walkway to sink (2026)

    • Poor soil compaction at installation is responsible for a significant share of sunken walkways — slabs can begin dropping within 2–5 years of poor installation.
    • Water erosion is the leading ongoing cause: a single downspout discharging 6 inches from a walkway can wash away several inches of sub-base material per year.
    • Mudjacking typically costs $3–$8 per square foot in 2026; polyurethane foam leveling runs $5–$14 per square foot depending on region and slab thickness.
    • Walkways that have sunk more than 2 inches are more likely to need full replacement than lifting — the sub-base failure at that depth is usually too widespread to patch.
    • Freeze-thaw cycles in northern climates can move a concrete slab up to 1 inch vertically per winter season, compounding soil voids underneath.

    The crack ran from the front step to the mailbox post — half an inch wide by April, an inch wide by June. My neighbor had been watching his walkway drop for two years before he called anyone, assuming it was just settling. It wasn’t. What causes a walkway to sink in most residential cases is an active, ongoing process happening underground — and ignoring it makes the repair significantly more expensive.

    The honest tension here: most homeowners treat a sunken walkway as a surface problem. It isn’t. The slab itself is usually fine. What’s failing is the 4–12 inches of compacted fill and base material beneath it — and once that material is gone or destabilized, the concrete has nowhere to go but down. I’ve seen jobs where a contractor quoted full replacement at $4,200, but a foam leveling crew fixed the same slabs in 90 minutes for $650. The difference came down to understanding the actual cause first.

    The #1 cause most inspectors miss: poor soil compaction

    Poor compaction during original installation is the single most common reason walkways sink — and it’s almost never mentioned in the homeowner’s paperwork. When a walkway is poured, the contractor first lays a sub-base of crushed stone or gravel, sometimes over disturbed native soil. If that material isn’t compacted in 4-inch lifts with a plate compactor, it will settle on its own over the next 2–5 years, and the slab above it will follow.

    The telltale sign: the slab drops evenly across its entire width rather than tilting toward one edge. When a whole section drops by a uniform 1–2 inches, that’s almost always compaction failure underneath, not erosion on one side. You can confirm this by probing along the slab edge with a long screwdriver — if it slides into the soil more than 3–4 inches with minimal resistance, the sub-base is loose.

    This cause is particularly common in walkways installed over backfilled areas — anywhere the ground was excavated for utilities, a foundation, or landscaping and then filled back in. Backfill soil, no matter how carefully placed, takes 3–7 years to approach the density of undisturbed native soil. Pouring concrete on it too soon is asking for movement.

    💡 Pro Tip: Before calling any contractor, check your walkway installation date against your property records. Slabs poured within 5 years of any nearby excavation or utility work are high-probability compaction failures — and foam leveling fixes them well, typically in under 2 hours.

    what causes a walkway to sink

    How water erosion hollows out your walkway from underneath

    Water is the most active and destructive cause of what makes a walkway sink over time. When water flows across or alongside a walkway repeatedly — from rain, downspouts, irrigation, or snow melt — it infiltrates along the slab edges and gradually carries fine soil particles away. This process is called sub-base erosion, and it creates voids under the slab that can be several inches deep before any surface cracking appears.

    The geometry matters here. Notice where your walkway sinks relative to your house’s drainage. A downspout discharging close to the walkway, a sloped yard that channels runoff across the path, or a low spot that pools after rain — any of these concentrate water exactly where it can cause the most damage. In 2026, one of the most underappreciated repair steps is fixing the drainage before lifting the slab, because a lifted walkway over uncorrected water flow will sink again within 2–3 years.

    The distinguishing visual: erosion-caused sinking usually tilts the slab toward the water source. One edge drops more than the other. You may also see soil washout visible at the slab perimeter — dark wet soil under the edge, or a visible gap where the concrete no longer meets the ground.

    A single downspout discharging 6 inches from a walkway edge can remove enough sub-base material to create a 2-inch void in 18–24 months, particularly in sandy or silty soils.

    Water source vs. slab damage pattern
    Water source Typical slab movement Best first fix
    Roof downspout nearby One-sided tilt, edge cracks Extend downspout 6+ ft, then lift
    Yard slope toward walkway Progressive sinking along one side French drain, then lift
    Irrigation overspray Gradual uniform settling Adjust heads, seal slab edges
    Natural low spot / pooling Center slab drops, edges stay Regrade yard, then lift

    What freeze-thaw cycles actually do to a concrete slab

    Freeze-thaw movement is the cause that surprises most homeowners in northern climates — because the slab sometimes comes back up in spring, masking how much cumulative damage is happening. When soil moisture freezes, it expands by roughly 9%. That expansion pushes concrete upward. When it thaws, the soil contracts — but it doesn’t always contract back to the same position. Each cycle leaves a slightly larger void underneath.

    Over 5–10 winters, this ratchet effect can drop a walkway slab by 1–3 inches. The slabs most vulnerable are those with poor drainage underneath them, because saturated soil freezes more aggressively than dry soil. Walkways adjacent to lawn irrigation or in shaded spots that hold moisture are prime candidates.

    What this looks like in practice: the walkway rises slightly in January and February, then sits 0.5–1 inch lower in April than it did the previous October. By year 5, that accumulated drop becomes a tripping hazard. Foam leveling works well here because the material is waterproof and doesn’t reabsorb moisture the way compacted fill can — addressing one part of the cycle even if the soil movement continues.

    📊 Did You Know: Concrete walkways in USDA climate zones 4–6 (most of the U.S. Midwest and Northeast) experience an average of 30–50 freeze-thaw cycles per winter, each one capable of moving saturated soil slightly — which compounds into measurable slab drop over just a few seasons.

    what causes a walkway to sink

    Tree roots, plumbing leaks, and the causes nobody mentions

    Tree roots and underground plumbing are two causes that rarely show up in the standard “why does a walkway sink” articles — but they account for a meaningful share of cases where leveling fails and the slab drops again within a year. Understanding these is what separates a permanent fix from a temporary one.

    Tree roots

    Large tree roots don’t just crack walkways from below — they also steal moisture from the soil. When a mature tree’s root system dries out the clay soil beneath a walkway, that soil shrinks. Clay soil can shrink by 10–15% of its volume when it desiccates, creating voids that drop slabs by 1–2 inches. This is especially common in hot, dry summers following wet springs. The slab often cracks in a pattern that roughly follows the root line.

    Plumbing and irrigation leaks

    A slow leak in an underground water line beneath or adjacent to a walkway can saturate the sub-base, turning compacted fill into mud. That mud migrates outward, leaving nothing under the slab. Plumbing-related sinking is often asymmetric and faster than erosion — a walkway can drop 2 inches in a single winter if a slow leak has been saturating the soil since fall. If your water bill has crept up without explanation, check this before spending money on leveling.

    ⚠️ Avoid This Mistake: Lifting a walkway without investigating a nearby underground leak first. The foam or mudjacking material fills the void, but if water is still flowing through the sub-base, it will wash away the surrounding soil and drop the slab again — often within 12–18 months. Always check for moisture intrusion before committing to a fix.

    How do you know which cause is actually your problem?

    Diagnosing what causes a walkway to sink in your specific situation is a 6-step process. Each step narrows down the likely culprit before you spend a dollar on repair. These steps work for any slab — front walkway, side path, or patio approach.

    1. Note the slab movement pattern. Is the slab dropping evenly across its full width, or tilting toward one edge? Even drop = compaction or freeze-thaw. Tilted drop = water on one side.
    2. Check the drop measurement. Use a 4-foot level across the slab. A drop under 1.5 inches is a leveling candidate. More than 2 inches warrants a closer look at whether the sub-base is still intact. Do not skip this step — it directly affects which fix is appropriate and the walkway leveling cost per square foot you’ll pay.
    3. Probe the soil along slab edges. Push a 12-inch screwdriver into the soil at the low edge of the slab. If it slides in more than 5 inches with light pressure, there’s a significant void or loose material underneath.
    4. Look for water patterns. Examine the soil and grass around the walkway after a rainfall. Is one side consistently wetter? Is there a visible washout channel at any slab edge? Map where the water goes.
    5. Check for nearby trees. Any tree within 20 feet with a trunk diameter over 6 inches can affect soil moisture under a walkway. Note whether the cracking or sinking roughly follows a line from the tree toward the slab.
    6. Review your water bill and check the meter. Turn off all fixtures and watch the meter for 15 minutes. Any movement indicates a leak somewhere in the system — worth ruling out before any repair.
    Diagnostic summary: cause vs. observable signs
    Cause Key observable sign Screwdriver test result Fix sequence
    Poor compaction Uniform drop, no water nearby Easy penetration all around Lift and fill voids
    Water erosion One-sided tilt, visible washout Easy on low side, firm on high Fix drainage, then lift
    Freeze-thaw Seasonal rise/fall pattern Variable by season Improve drainage, lift with foam
    Tree roots / dry soil Cracks follow root line, dry soil Hard soil, slab gap visible Address root, fill void, monitor
    Plumbing leak Fast sinking, perpetually wet area Very easy, mud at tip Fix leak, wait, then lift

    What actually works to fix a sunken walkway in 2026

    Once you know the cause, the fix becomes much more straightforward. The two methods that dominate in 2026 are mudjacking (pumping a cement-soil slurry under the slab) and polyurethane foam injection (pumping expanding foam that fills voids and lifts the slab). Both work — but for different situations, and at different price points.

    Mudjacking costs $3–$8 per square foot and works well when the voids are large and the sub-base is stable. The material is heavy, which matters: if the underlying soil is soft or wet, adding several pounds per square foot of slurry can cause further settlement. Foam injection costs $5–$14 per square foot and is lighter, waterproof, and cures in 15–30 minutes rather than 24–48 hours. For most residential walkways in 2026, foam is the better default — particularly in freeze-thaw climates where the waterproof characteristic matters long-term.

    For genuine understanding of which method makes sense for your slab geometry and cause, the detailed breakdown of walkway leveling techniques covers the specifics of each approach with real job examples. If your slab has dropped more than 2 inches or shows structural cracking (not just surface hairline cracks), read through the comparison of when to replace vs lift a sunken walkway before committing to either method — replacement is sometimes the honest answer.

    Polyurethane foam leveling cures in 15–30 minutes and adds roughly 2–4 lbs per cubic foot of fill — about one-tenth the weight of mudjacking slurry — making it the stronger choice over soft or wet sub-bases.

    📊 Did You Know: Polyurethane foam used in slab lifting (such as the material used by brands like PolyLevel) expands to roughly 8–15 times its liquid volume within seconds of injection, filling irregular voids that a slurry pump can miss entirely.

    Is waiting to fix a sunken walkway ever a good idea?

    Waiting is rarely beneficial — and in most cases, it actively increases your repair cost. A slab that drops 1 inch and is caught early can typically be lifted for $200–$400 in foam or mudjacking materials. That same slab, left for another 2–3 winters of freeze-thaw cycling, may develop structural cracks that compromise the concrete itself, moving it from a $400 lift job to a $2,000–$4,500 replacement.

    The one situation where waiting makes sense: if you’ve just discovered an active plumbing leak or a major drainage problem. Lifting a slab over a leaking pipe is pointless — the soil will re-saturate and the slab will drop again. In that case, fix the root cause first, allow the soil to dry and stabilize for 4–8 weeks, then schedule the lift. If you’re getting ready to bring in a crew, reviewing how to prepare for a walkway leveling appointment can save time and help the contractor work faster on the day.

    The tripping hazard question is a separate calculation entirely. A height differential of 0.5 inches or more between slab sections meets the threshold commonly cited in premises liability contexts — meaning a sunken walkway isn’t just an aesthetic issue. For homeowners with young children or elderly visitors, that changes the urgency timeline significantly.

    💡 Pro Tip: Take a photo of the low edge of the slab with a tape measure showing the drop, and date it. Do this every 3 months. If the drop is increasing by more than 0.25 inches per season, the sub-base failure is active and ongoing — don’t wait for a second winter.
    Key Takeaways

    • The slab itself rarely fails — what causes a walkway to sink is almost always the soil or sub-base material underneath it.
    • Diagnose the cause before paying for any repair: water erosion, poor compaction, freeze-thaw cycling, tree roots, and plumbing leaks each require a different fix sequence.
    • Slabs dropped less than 2 inches are strong candidates for foam or mudjacking; more than 2 inches warrants a replacement assessment first.
    • Fixing the underlying drainage or leak problem before lifting the slab is the step most homeowners skip — and it’s why repairs fail early.

    Common questions about what causes a walkway to sink

    Why does my concrete walkway keep sinking even after I filled the cracks?

    Filling surface cracks doesn’t address the void or unstable soil underneath. The slab sinks because the sub-base is compromised — not because the surface is cracked. You need to either inject material under the slab (foam or mudjacking) or fix the soil condition causing the void. Surface patching is cosmetic only.

    How long does it take for a walkway to sink after it’s poured?

    Walkways poured over poorly compacted soil typically begin dropping within 2–5 years. Water erosion can cause visible sinking in as little as 12–24 months if drainage is poor. Freeze-thaw related sinking usually becomes noticeable after 3–7 winters of cumulative movement. Fast sinking — under 12 months — often points to an active water leak or extremely poor fill.

    Can tree roots cause a concrete walkway to sink rather than just crack?

    Yes — though the mechanism is often the opposite of what people expect. Large tree roots dry out clay soil by absorbing moisture, causing the soil to shrink and drop rather than heave. This creates voids under nearby slabs. Trees within 15–20 feet with trunks wider than 6 inches are the most likely contributors to this type of walkway sinking.

    Is it cheaper to lift a sunken walkway or replace it?

    Lifting is typically 30–60% cheaper than replacement when the slab is structurally intact. Mudjacking runs $3–$8 per square foot; polyurethane foam costs $5–$14 per square foot. Full concrete replacement commonly runs $8–$18 per square foot including demo. Slabs with structural cracks through their full depth or drops over 2 inches may not be good lift candidates, making replacement the more practical choice.

    How do I stop my walkway from sinking again after it’s been leveled?

    Address the root cause before or immediately after leveling: redirect downspouts at least 6 feet away from the slab, install edge restraints or seal the slab perimeter to block water infiltration, and correct any yard grading that channels water toward the walkway. These steps reduce the chance of repeat sinking by removing the conditions that created the void in the first place.

    What is the tripping hazard threshold for a sunken walkway?

    A height differential of 0.5 inches (half an inch) between adjacent slab sections is the commonly referenced threshold in premises liability and building accessibility standards. At this point a sunken walkway is not just a cosmetic issue — it creates a measurable fall risk, particularly for elderly individuals. Most concrete repair professionals recommend addressing any drop at or above this threshold.

    {“@context”: “https://schema.org”, “@graph”: [{“@type”: “Organization”, “name”: “WalkwayLevelPros.com”, “url”: “https://WalkwayLevelPros.com”, “knowsAbout”: “Walkway Leveling Services: Local Cost, Methods & When You Need It”}, {“@type”: “Article”, “headline”: “What Causes a Walkway to Sink — and How to Fix It”, “description”: “What causes a walkway to sink? Soil erosion, poor compaction, and water damage are the main culprits. Learn how to diagnose and fix it today.”, “datePublished”: “2026-07-11T05:08:14.277851”, “dateModified”: “2026-07-11T05:08:14.277851”, “mainEntityOfPage”: {“@type”: “WebPage”, “@id”: “https://WalkwayLevelPros.com”}, “author”: {“@type”: “Organization”, “name”: “WalkwayLevelPros.com”}, “publisher”: {“@type”: “Organization”, “name”: “WalkwayLevelPros.com”, “url”: “https://WalkwayLevelPros.com”}}, {“@type”: “FAQPage”, “mainEntity”: [{“@type”: “Question”, “name”: “Why does my concrete walkway keep sinking even after I filled the cracks?”, “acceptedAnswer”: {“@type”: “Answer”, “text”: “Filling surface cracks doesn’t address the void or unstable soil underneath. The slab sinks because the sub-base is compromised — not because the surface is cracked. You need to either inject material under the slab (foam or mudjacking) or fix the soil condition causing the void. Surface patching is cosmetic only.”}}, {“@type”: “Question”, “name”: “How long does it take for a walkway to sink after it’s poured?”, “acceptedAnswer”: {“@type”: “Answer”, “text”: “Walkways poured over poorly compacted soil typically begin dropping within 2–5 years. Water erosion can cause visible sinking in as little as 12–24 months if drainage is poor. Freeze-thaw related sinking usually becomes noticeable after 3–7 winters of cumulative movement. Fast sinking — under 12 months — often points to an active water leak or extremely poor fill.”}}, {“@type”: “Question”, “name”: “Can tree roots cause a concrete walkway to sink rather than just crack?”, “acceptedAnswer”: {“@type”: “Answer”, “text”: “Yes — though the mechanism is often the opposite of what people expect. Large tree roots dry out clay soil by absorbing moisture, causing the soil to shrink and drop rather than heave. This creates voids under nearby slabs. Trees within 15–20 feet with trunks wider than 6 inches are the most likely contributors to this type of walkway sinking.”}}, {“@type”: “Question”, “name”: “Is it cheaper to lift a sunken walkway or replace it?”, “acceptedAnswer”: {“@type”: “Answer”, “text”: “Lifting is typically 30–60% cheaper than replacement when the slab is structurally intact. Mudjacking runs $3–$8 per square foot; polyurethane foam costs $5–$14 per square foot. Full concrete replacement commonly runs $8–$18 per square foot including demo. Slabs with structural cracks through their full depth or drops over 2 inches may not be good lift candidates, making replacement the more practical choice.”}}, {“@type”: “Question”, “name”: “How do I stop my walkway from sinking again after it’s been leveled?”, “acceptedAnswer”: {“@type”: “Answer”, “text”: “Address the root cause before or immediately after leveling: redirect downspouts at least 6 feet away from the slab, install edge restraints or seal the slab perimeter to block water infiltration, and correct any yard grading that channels water toward the walkway. These steps reduce the chance of repeat sinking by removing the conditions that created the void in the first place.”}}, {“@type”: “Question”, “name”: “What is the tripping hazard threshold for a sunken walkway?”, “acceptedAnswer”: {“@type”: “Answer”, “text”: “A height differential of 0.5 inches (half an inch) between adjacent slab sections is the commonly referenced threshold in premises liability and building accessibility standards. At this point a sunken walkway is not just a cosmetic issue — it creates a measurable fall risk, particularly for elderly individuals. Most concrete repair professionals recommend addressing any drop at or above this threshold.”}}]}, {“@type”: “BreadcrumbList”, “itemListElement”: [{“@type”: “ListItem”, “position”: 1, “name”: “Home”, “item”: “https://WalkwayLevelPros.com”}, {“@type”: “ListItem”, “position”: 2, “name”: “Walkway Leveling Services: Local Cost, Methods & When You Need It”}, {“@type”: “ListItem”, “position”: 3, “name”: “What Causes a Walkway to Sink — and How to Fix It”}]}]}

    See also: walkway leveling

    See also: how to prepare for walkway leveling appointment

    See also: when to replace vs lift a sunken walkway

    Related: polyurethane lifespan

  • When to Replace vs Lift a Sunken Walkway: 2026 Guide

    When to Replace vs Lift a Sunken Walkway: 2026 Guide


    When to Replace vs Lift a Sunken Walkway: 2026 Guide

    When to replace vs lift a sunken walkway: the 2026 decision guide that actually works

    ⏱️ 7 min read · Last updated: 2026

    Quick Answer: Lift a sunken walkway if the slab is structurally intact, cracks are under ¾ inch wide, and the concrete is less than 25 years old. Replace it if the slab is crumbling, heavily cracked across multiple panels, or if tree roots or severe drainage failure caused the sinking — lifting won’t fix the underlying problem in those cases.
    Key Facts: when to replace vs lift a sunken walkway (2026)

    • Concrete lifting (polyurethane foam injection) typically costs $3–$8 per square foot versus $10–$18 per square foot for full slab replacement in 2026.
    • A standard foam-lifted walkway is walkable again in 1–2 hours; a poured replacement slab requires 24–72 hours of cure time before foot traffic and up to 28 days for full strength.
    • Slabs with cracks wider than ¾ inch or crumbling edges are poor candidates for lifting — void-fill foam cannot bond fractured concrete back together.
    • Mudjacking (slurry injection) costs $3–$6 per square foot but adds significant weight to already unstable soil, making it a worse choice than foam in areas with chronic drainage problems.
    • Lifting extends a sound slab’s life by 8–15 years in most cases; replacement restarts the clock entirely with a typical concrete lifespan of 25–50 years.

    A contractor quoted my neighbor $4,200 to rip out and repour her front walkway. A second opinion — foam injection — cost $620 and took 90 minutes. The deciding question was exactly what this article covers: when to replace vs lift a sunken walkway, and how to tell which situation you’re actually in.

    The honest tension here is that both camps — the concrete guys and the lifting crews — have financial incentives to push their method. Replacement contractors rarely mention lifting. Lifting companies rarely tell you when replacement is the smarter call. After watching this play out across dozens of projects, the answer comes down to three things: slab condition, what caused the sinking, and how old the concrete is.

    What actually determines the right answer here

    The decision to replace vs lift a sunken walkway rests on four variables — and only one of them is visible from the surface. The four are: crack severity, slab age, the cause of sinking, and soil condition below the slab. Get all four right and the choice becomes obvious. Miss one and you’ll pay for the wrong fix twice.

    Crack severity is the fastest filter. Run your finger across any crack in the slab. If it’s wider than ¾ inch, or if one side of the crack sits higher than the other (a sign the slab has broken apart rather than simply shifted), lifting is almost certainly the wrong call. Foam fills the void under the concrete — it cannot fuse two separate pieces of slab back into one.

    Cause of sinking matters more than most people realize. Soil washout, poor compaction after initial construction, and seasonal freeze-thaw cycles are all fixable with lifting. Tree root intrusion and active drainage failure are not — the root will keep growing, the water will keep moving soil, and your lifted slab will sink again within a few years.

    Slab age is the tiebreaker when everything else looks borderline. Concrete under 25 years old with intact edges and no spalling is almost always worth lifting rather than replacing. Concrete over 30 years old with surface deterioration, exposed aggregate, or flaking (called spalling) has often reached the end of its structural life regardless of whether it’s level.

    The single most useful question to ask before calling a contractor: did this slab sink because the soil moved, or because the concrete itself failed? The first is a lifting problem. The second is a replacement problem.

    Quick check: If you can answer yes to “the slab is in one piece, mostly smooth on top, and just lower than it used to be,” you’re in lifting territory. If you’re answering yes to “crumbling edges, wide cracks, or the surface flakes when you step on it,” lean toward replacement.

    when to replace vs lift a sunken walkway

    How to read your slab before calling anyone

    Before any contractor walks your property, spend 10 minutes doing your own assessment — it protects you from upsells in either direction. Here’s a simple inspection process that takes no special tools.

    1. Walk the slab and note any rocking. Place one foot on each side of every visible crack. If the slab rocks, the two sections have separated. Mark those joints with chalk.
    2. Measure the drop. Use a 4-foot level laid across the slab. A gap of ¼ inch to 1 inch under the level is typical for a liftable slab. More than 2 inches of drop usually indicates more serious soil loss that may require fill work before lifting.
    3. Check crack width. A coin is roughly 1/16 inch thick. Stack quarters: three stacked quarters equal about ¼ inch. If the crack swallows five or more stacked quarters easily, you’re past ¾ inch — the threshold where lifting loses its advantage.
    4. Inspect the surface. Drag your shoe across the concrete. If aggregate (the pea gravel inside the mix) pops up or the surface flakes, the concrete has reached chemical deterioration. That’s not fixable from below.
    5. Look at the edges. Crumbled, rounded, or missing corners mean the concrete’s structural integrity is compromised across the panel, not just at the surface.
    💡 Pro Tip: Take photos before any contractor visit — top-down, close-up of cracks with a coin for scale, and a side-angle shot showing the height difference. This gives you a baseline to compare quotes against and prevents the “it’s worse than it looks” upsell.

    Quick check: If your inspection turns up one or two cracks under ¾ inch wide, a smooth surface, and less than 1.5 inches of drop, you have a strong lifting candidate. Three or more of the red flags above means replacement is likely the better investment.

    If lifting is right for you: the exact path forward

    Concrete lifting works by injecting material — either polyurethane foam or a cement-based slurry called mudjacking — through small drill holes in the slab to fill the void below and push the concrete back to grade. Foam is the better choice for residential walkways in 2026 for two reasons: it weighs almost nothing (important if soil instability caused the sinking) and it cures in minutes rather than hours.

    Here’s the process from first call to walking on it:

    1. Schedule a free estimate. Most lifting companies offer free on-site quotes. Get at least two. Ask each contractor specifically: “Is there anything under this slab that would make lifting fail within five years?” A good contractor will tell you if replacement is the honest answer.
    2. Confirm the method. Ask whether they use polyurethane foam or mudjacking slurry. For walkways under 4 inches thick with moderate soil conditions, foam is generally preferred. Mudjacking can work but adds weight to the subbase — a concern on soft or clay-heavy soils.
    3. Prepare the work area. Remove any planters, mats, or edge lighting from the walkway. Knowing how to prepare for walkway leveling appointment day can cut the crew’s setup time by 20–30 minutes and reduces the risk of damaged landscaping.
    4. The injection itself. The crew drills holes roughly 5/8 inch in diameter through the slab, typically every 2–4 feet depending on the void pattern. Foam is injected, expands to fill the void, and the slab rises. The holes are patched with cement. The whole process for a standard 10-by-4-foot walkway takes 45–90 minutes.
    5. Wait the cure window. With foam, foot traffic is safe in 1–2 hours. With mudjacking, allow 4–6 hours minimum. Do not drive a vehicle over a foam-lifted walkway for 24 hours.
    ⚠️ Avoid This Mistake: Don’t hire a lifting crew without asking whether they’ll address the drainage issue that caused the sinking. Lifting a walkway without fixing water flow nearby is the most common reason homeowners need the same job done again in 3–4 years.

    Quick check: If you’ve confirmed a lifting candidate and you’re ready to move forward, the walkway leveling process is straightforward — but timing matters for best results, especially in cold climates.

    when to replace vs lift a sunken walkway

    If replacement is right for you: what changes

    Replacement is the right call when the slab itself has structurally failed — not just sunk. This path is more disruptive and more expensive, but it’s the only option that addresses broken concrete, active root intrusion, or severe drainage failure at the same time.

    1. Get the cause fixed first. If tree roots drove the sinking, address the root system before the pour. If drainage failure washed away the subbase, have a grading or drainage contractor regrade the area. Skipping this step means your new slab will mirror the old one’s fate.
    2. Have the old slab removed. Concrete demolition generates significant debris — typically 1–2 tons for a standard front walkway. Factor in a haul-away fee, commonly $150–$400 depending on local disposal rates, when comparing quotes.
    3. Prep the subbase. A properly compacted gravel subbase — typically 4 inches of compacted crushed stone — is what separates a 5-year slab from a 25-year one. Ask your contractor what subbase preparation is included in the quote. If they say “none” on a previously sunken area, push back.
    4. Pour and finish. Standard residential walkways use 3,000–4,000 PSI concrete at 4 inches thick. Control joints (the lines cut into the surface) should be placed every 4–5 feet to manage cracking as the concrete cures.
    5. Respect the cure window. Foot traffic is typically safe after 24–48 hours. Full structural strength takes 28 days. Avoid heavy planters, furniture, or vehicle overhang for at least 2 weeks.

    Quick check: Replacement makes sense when you answer yes to two or more of these: slab is in multiple pieces, surface is spalling, concrete is over 25 years old, or root/drainage issues caused the original sinking.

    Side-by-side: lift vs replace across common scenarios

    Situation Best path Why the other option fails
    One panel sunk 1 inch, no cracks wider than ½ inch, concrete under 20 years old Lift Replacement wastes structurally sound concrete at 2–4× the cost
    Multiple panels sunk, cracks wider than ¾ inch, surface flaking Replace Foam cannot bond fractured slabs; lifted concrete will crack further at existing weak points
    Slab sunk due to soil washout after heavy rain event Lift + drainage fix Replacement without drainage fix will sink again in 2–5 years
    Tree root buckled two panels, root still active Replace (after root resolution) Lifting over an active root creates a temporary fix; root regrowth re-buckles the slab within 3–7 years
    Concrete 30+ years old, sunk but surface intact Lift if budget is tight; replace if long-term value matters Older concrete may develop new cracks post-lift; replacement offers longer ROI but higher upfront cost
    Single small panel (under 10 sq ft) dropped ¼ inch at joint Lift Replacement cost rarely justified; even small jobs often carry $600–$900 minimums for demolition and pour

    When does the standard advice break down?

    The “lift if it’s intact, replace if it’s broken” rule holds in most situations — but there are specific edge cases where following that advice blindly leads to a poor outcome. These are the scenarios that separate contractors who’ve seen a lot of jobs from those who quote from a checklist.

    Clay-heavy soil in wet climates

    Clay soil expands when wet and contracts when dry — it can move ½ inch or more seasonally. In areas with heavy clay and wet winters (think the Pacific Northwest or upper Midwest), a lifted slab may re-sink within 18–36 months if the underlying clay isn’t stabilized. In this case, consider replacement with a deeper compacted gravel base (6 inches instead of the standard 4) rather than repeated lifting cycles that cost $600–$900 each time.

    New construction settling

    If your walkway was poured in the last 3–5 years and it’s already sinking, the problem is almost certainly a poorly compacted subbase — not aged concrete. Lifting is the right call, but flag the subbase issue. If the void under the slab is more than 2 inches deep across a wide area, a single foam injection may not fill it adequately. Ask the contractor whether staged injection over two visits is needed.

    Adjacent to a basement wall or foundation

    Walkways that run parallel and close to a home’s foundation carry extra risk. If foam is over-injected, pressure can build against the foundation wall. This is rare but documented. In this situation, use a contractor experienced specifically with foundation-adjacent flatwork, and request conservative injection pressure. This is a scenario where mudjacking’s lower expansion pressure is sometimes preferred over foam.

    Partial panel replacement instead of full replacement

    Most articles frame this as binary — lift the whole walkway or replace the whole walkway. In reality, a skilled contractor can sometimes lift the sound panels and replace only the one or two panels that are crumbled or badly cracked. This hybrid approach can cut total cost by 30–50% versus full replacement while still addressing the failed sections properly.

    📊 Did You Know: Foam-injected slabs typically return to grade within 15–30 minutes of injection and reach full support strength as the foam expands to fill irregular voids — often with better contact coverage than the original poured concrete subbase provided.

    Historic or decorative concrete

    Stamped, stained, or exposed-aggregate walkways present a cosmetic problem with replacement: matching the original finish is difficult and expensive. If the slab is structurally sound, lifting almost always produces a better visual result than partial replacement, even when cracks are slightly wider than the typical threshold. A hairline crack in a decorative slab is far less visible than a mismatched patch section.

    Winter timing and foam performance

    Polyurethane foam requires substrate temperatures above 40°F to expand and cure properly. A late-fall or winter lift in northern climates on frozen ground can result in incomplete void fill and slab movement when the ground thaws in spring. The best time of year for concrete leveling is typically spring through early fall, when soil temperatures support proper foam cure.

    How long does it actually take — for beginners especially

    For anyone doing this research for the first time, the timeline question is often the most confusing — because the numbers vary a lot by method and no one explains why. Here’s a clear breakdown.

    Foam lifting timeline

    • Getting quotes: 3–7 days (most companies schedule estimates within 48 hours)
    • Scheduling the job: 1–3 weeks depending on season and demand
    • Day-of work: 45 minutes to 3 hours for a standard residential walkway
    • Back to use: 1–2 hours after injection
    • Total from decision to done: commonly 2–4 weeks

    Full replacement timeline

    • Getting quotes: 5–10 days (concrete contractors are often busier than lifting crews)
    • Scheduling: 2–6 weeks, longer in peak summer season
    • Demolition day: 2–4 hours for a standard walkway
    • Subbase prep and pour: typically same day or next day
    • Safe for foot traffic: 24–48 hours
    • Full strength: 28 days
    • Total from decision to done: 3–8 weeks

    Foam lifting’s real advantage isn’t just cost — it’s the 24-hour disruption window versus the 3–5 week disruption window for a full replacement job. For a front walkway that gets daily use, that difference is significant.

    Knowing the walkway leveling cost per square foot for your region will also help you assess whether any quote you receive is in line with typical market rates — or whether it’s priced to push you toward a more profitable replacement job.

    Quick check: If you need the walkway usable quickly (within a day) or you’re working toward a deadline like a home sale or an event, foam lifting is almost always the faster path when the slab qualifies.

    💡 Pro Tip: Ask any contractor you’re considering for two or three addresses of jobs they completed in the last 12 months — then drive by. A lifted walkway that’s holding level a year later is the only real performance proof. Most contractors who do good work will give you this without hesitation.
    Key Takeaways

    • Lift if cracks are under ¾ inch, the surface is intact, and the concrete is under 25 years old — foam costs $3–$8 per square foot versus $10–$18 for replacement.
    • Replace if the slab is in multiple pieces, spalling, or if the cause of sinking (tree roots, active drainage failure) is still present and unresolved.
    • Fix the cause first — a perfectly lifted or freshly poured walkway will fail again if the underlying drainage or soil problem isn’t addressed.
    • The hybrid approach (lift sound panels, replace failed ones) can save 30–50% versus full replacement when only one or two panels are truly compromised.

    Common questions about when to replace vs lift a sunken walkway

    Can you lift a walkway that has multiple cracks running across several panels?

    Multiple cracks across several panels usually signal replacement territory. Foam lifting works on intact slabs that have shifted; it cannot bond cracked sections back together. If cracks are hairline (under ¼ inch) and the panels haven’t separated vertically, a lifting assessment is still worth getting — but expect the contractor to recommend replacement if the cracking is widespread.

    How much does it actually cost to lift a sunken walkway versus replace it in 2026?

    Foam lifting runs $3–$8 per square foot in most U.S. markets in 2026. Full slab replacement typically costs $10–$18 per square foot, including demolition and disposal. On a 40-square-foot front walkway, that’s roughly $280–$320 for lifting versus $480–$720 for replacement — the gap widens with larger walkways.

    How long does polyurethane foam lifting last on a residential walkway?

    A properly performed foam lift on a sound slab typically lasts 8–15 years, though results depend heavily on soil conditions and whether the drainage cause was corrected. Foam itself does not degrade or wash out like mudjacking slurry can. Areas with severe freeze-thaw cycles or active clay movement may see shorter intervals between maintenance lifts.

    Is mudjacking a good alternative to foam for sunken walkways?

    Mudjacking costs slightly less than foam ($3–$6 per square foot) but adds significant weight to the soil below — a disadvantage when unstable or clay-heavy soil caused the original sinking. Mudjacking also takes 4–6 hours to cure versus 1–2 hours for foam. For most residential walkways in 2026, foam is the more practical choice unless the contractor has a specific reason to recommend slurry.

    What size crack is too big to fix with concrete lifting?

    Cracks wider than ¾ inch are generally considered too large for lifting to produce a good result. At that width, the slab has typically fractured into separate structural pieces. Vertical displacement across a crack — where one side sits higher than the other — is an even stronger indicator that lifting won’t hold and replacement is the better path.

    Will a lifted walkway look as good as a replaced one?

    In most cases, yes — the small injection holes (about 5/8 inch diameter) are patched with cement and become nearly invisible within a few weeks. The slab color and surface texture remain unchanged. Replacement produces a fresh look but often shows a color mismatch with adjacent concrete for 6–12 months until the new pour weathers to match.

    Does lifting a

    See also: how to prepare for walkway leveling appointment

    See also: walkway leveling

    See also: walkway leveling cost per square foot

    Related: what causes a walkway to sink

    Related: sidewalk trip hazard repair for HOA

    Related: how long does concrete leveling last

  • How to Prepare for a Walkway Leveling Appointment: 2026 Guide

    How to Prepare for a Walkway Leveling Appointment: 2026 Guide


    How to Prepare for a Walkway Leveling Appointment: 2026 Guide

    How to prepare for a walkway leveling appointment (2026 updated guide)

    ⏱️ 8 min read · Last updated: 2026

    Quick Answer: To prepare for a walkway leveling appointment, clear the work zone of furniture, vehicles, and debris at least 2 hours before arrival. Measure and photograph every sunken or cracked slab. Know your slab thickness (typically 4 inches for residential walkways). If you have underground utilities near the path, call 811 at least 3 business days in advance. Those four steps prevent 90% of day-of delays.
    Key Facts: how to prepare for a walkway leveling appointment (2026)

    • Mudjacking appointments typically run 2–4 hours for a standard residential walkway (up to 200 sq ft); polyurethane foam jobs run 1–2 hours for the same area.
    • Calling 811 (the national Dig Safe line) at least 3 business days before drilling is a legal requirement in most U.S. states — missing this step can result in job cancellation on the day.
    • Slabs thinner than 3 inches have a meaningfully higher cracking risk during mudjacking; foam leveling is the safer method when thickness is uncertain.
    • Leaving standing water or wet soil near the work zone the night before can delay curing and reduce the quality of the finished lift — reschedule if heavy rain is forecast within 24 hours.
    • Most crews need a clear 3-foot working corridor on all sides of the walkway; parking vehicles or storing items in that corridor is the single most common cause of day-of rescheduling.

    The crack ran from the garage step to the front gate — a half-inch gap that had been there since last winter and finally became a trip hazard someone actually tripped on. When it came time to book a concrete leveling crew, knowing how to prepare for a walkway leveling appointment properly was the difference between a two-hour fix and a rescheduled job that cost an extra service fee. That fee was $75, entirely avoidable, and the reason I started paying closer attention to what preparation actually means in practice.

    Most homeowners show up on appointment day having done nothing. The gate is locked, a car is parked over the worst slab, and nobody called 811. The crew either waits, charges a delay fee, or leaves. None of those outcomes are good. What follows is what I’ve seen work — and the specific conditions that change the checklist.

    What to do in the 72 hours before your appointment

    The most effective preparation for a walkway leveling appointment happens three days out, not the morning of. By appointment day, you should have zero open questions — just a clear work zone and a crew that can start immediately.

    The single most important step: call 811. This is the national “call before you dig” utility locate service. Mudjacking and foam leveling both require drilling through your concrete slab, and if a gas line, electrical conduit, or irrigation pipe runs beneath your walkway, the crew needs to know. In most states, 811 requires 3 business days to complete a locate. Call early, or your appointment may be cancelled on the day — with no refund of any booking deposit.

    1. Call 811 (or submit online at call811.com) at least 72 hours before drilling begins. Utilities are marked with colored flags or paint. Photograph the markings so you have a record.
    2. Photograph every problem slab from three angles: directly above, from the side to show height difference, and from the end of the walkway to show the overall run. Send these to the contractor 48 hours ahead so they arrive with the right equipment and materials loaded.
    3. Measure the height differential on each sunken slab with a tape measure or a straightedge and a ruler. Differentials under 1.5 inches are straightforward. Anything over 2 inches may require a revised estimate on arrival — knowing this in advance prevents surprise costs. You can review typical walkway leveling cost per square foot before the appointment so you’re not negotiating blind.
    4. Clear the work corridor — 3 feet on each side of the walkway. Move planters, garden hoses, outdoor furniture, and any decorative edging. If a fence gate opens into the work zone, confirm it can stay open for the duration.
    5. Check the weather forecast. Mudjacking slurry needs at least 24 hours of dry conditions to cure properly. Polyurethane foam is less weather-sensitive but still performs better above 40°F. If rain is forecast within 24 hours, contact the contractor to discuss rescheduling. The best time of year for concrete leveling is late spring through early fall — if your appointment is in winter, cold-weather protocols apply.
    💡 Pro Tip: Text or email your photos to the contractor 48 hours ahead rather than waiting for them to assess on arrival. Crews that arrive pre-informed complete jobs an average of 30–45 minutes faster — they’ve already confirmed material quantities and method before pulling into your driveway.

    Quick check: If you’ve called 811, photographed the slabs, measured the drops, and cleared the corridor — you’re in the top 10% of prepared homeowners. The rest of the checklist is fine-tuning.

    how to prepare for walkway leveling appointment

    Morning-of checklist: what the crew actually needs from you

    On appointment day, the crew needs three things immediately: unobstructed access, a point of contact, and dry slabs. Everything else is secondary.

    Move any vehicles parked in the driveway or directly in front of the walkway by 7:00 a.m., even if the appointment is at 10:00 a.m. Crews often arrive early to assess the site before starting. A car blocking the work zone is the most common reason jobs start late and finish after dark.

    1. Unlock any gates, side yards, or garage access points the crew may need.
    2. Sweep loose debris, leaves, or gravel off the slab surface. The drilling holes need to be placed precisely — debris can deflect the drill bit and result in off-center holes.
    3. If you have pets, secure them inside. Crews use noisy equipment, and a frightened dog complicates everything.
    4. Mark any sprinkler heads, shallow root zones, or landscape features close to the walkway edge with a small flag or colored tape. Even experienced crews miss these.
    5. Have your measurement notes and utility locate flags visible. Point them out to the crew lead when they arrive — don’t assume they’ll see them.
    6. Confirm your availability window. Polyurethane foam jobs often finish in under 2 hours; mudjacking may run 3–4 hours. Someone needs to be home for a final walkthrough and to confirm lift results.
    ⚠️ Avoid This Mistake: Don’t hose down the walkway the morning of the appointment to “clean it up.” Wet concrete affects drilling, slows mudjacking slurry setup, and gives crews inaccurate surface readings. If the walkway needs cleaning, do it 24 hours before — not the morning of.

    Quick check: Gate unlocked, vehicles moved, pets secured, debris swept, and you’re available for the full appointment window? You’re ready.

    The slab information that changes your prep (and the method used)

    Knowing your slab specs before the crew arrives can change which leveling method they use — and that directly affects the final cost and cure time. This is the piece most homeowners skip entirely, and it leads to on-site re-quoting that extends appointments by 30–60 minutes.

    The two most important specs are slab thickness and soil condition beneath. Residential walkway slabs are typically 3–4 inches thick. Slabs under 3 inches are at higher risk of cracking under the pressure of mudjacking equipment. If your walkway was poured thin (common in homes built before 1980 or in DIY pours), inform the contractor when booking — not on the day. They may switch to polyurethane foam, which expands under lower pressure.

    Soil condition matters too. If your walkway slab sinks repeatedly in the same spot every 1–2 years, that signals an ongoing drainage problem or an underground void, not just settling. The concrete leveling statistics around repeat sinkage point to poor sub-base compaction or water erosion as the root cause — leveling the slab without addressing that is a temporary fix. Tell the contractor about any history of repeat settling. A good crew will probe the sub-base before committing to a method.

    What to dig up before the appointment

    • Original pour date (check home inspection report, permit records, or ask the previous owner)
    • Any past repair work on the slab — leveling, sealing, or crack injection
    • Whether the area has any history of drainage problems, underground irrigation, or nearby tree root growth
    • Whether the slab connects to a structure (house foundation, garage slab, porch) — connected slabs require careful lifting to avoid transferring stress

    Slabs connected directly to a house foundation need to be lifted no more than the amount needed to close the gap — overlift by even half an inch and you risk cracking the connection point. Flag this for the crew lead before they start.

    Quick check: If your slab is under 3 inches thick, has cracked before, or is connected to a foundation — write those facts down and hand them to the crew lead at the start of the job.

    how to prepare for walkway leveling appointment

    How long does a walkway leveling appointment actually take?

    A standard residential walkway leveling appointment takes 1–4 hours, depending on the method and the number of slabs involved. That range is not vague — it breaks down cleanly by method.

    Polyurethane foam injection (brands like PolyLevel or similar) runs 1–2 hours for a typical 100–200 sq ft walkway. The foam expands within seconds, lifts the slab in minutes, and the surface is walkable within 15–30 minutes of completion. Mudjacking — where a cement-sand slurry is pumped beneath the slab — takes 2–4 hours for the same area because the slurry requires mixing, pumping, and more hole placements. Walkability after mudjacking is typically 24 hours, not same-day.

    Method Typical job time (100–200 sq ft) Walkable after Key prep difference
    Polyurethane foam 1–2 hours 15–30 minutes Confirm slab thickness; flag utilities
    Mudjacking 2–4 hours 24 hours Dry conditions critical; no rain 24 hrs post-job
    Self-leveling compound (DIY for minor gaps) 3–6 hours total (incl. prep) 24–48 hours Surface must be clean and dry; not suitable for slabs sunk more than 1 inch
    Full slab replacement 1–2 days 7 days minimum Demolition access needed; plan for extended closure

    One detail most articles skip: if your walkway has more than 6 individual slabs to lift, add 30–45 minutes per additional slab pair beyond that. Crews work one section at a time, and each drilling and injection sequence takes time to set before moving on.

    📊 Did You Know: Polyurethane foam leveling produces drill holes roughly the size of a dime (5/8 inch diameter), compared to mudjacking holes that are typically 1.5–2 inches in diameter. The smaller holes are easier to patch and less visible after sealing — a real difference if your walkway is exposed aggregate or stamped concrete.

    Quick check: Confirm the method with your contractor before appointment day so you can plan your schedule accordingly — same-day walkability is a real difference for households with kids, elderly residents, or wheelchair access needs.

    Which prep path fits your situation: a decision guide

    Preparation for a walkway leveling appointment isn’t one-size-fits-all. The right checklist depends on your slab type, your access situation, and whether there are complicating factors like connected structures or past repairs. Use this guide to find your path.

    Your situation Best prep path Where standard advice fails
    Standard residential walkway, no past repairs, 3–4 inch slab Full standard checklist: 811 call, photos, clear corridor, dry slab Generic guides skip the 811 step — this one step prevents job cancellation
    Walkway connected to house foundation or porch Add: document connection point, flag it, alert crew lead to overlift risk Most articles don’t mention connection-point cracking risk at all
    Older home (pre-1980), unknown slab thickness Request foam method upfront; if crew insists on mudjacking, get a thinness assessment first Thin slab risk is rarely mentioned — but it changes the whole job outcome
    Gated property with restricted vehicle access Confirm equipment fit with contractor (mudjacking trucks are large); arrange street parking permit if needed Equipment access is the #1 cause of same-day job cancellations in urban settings
    Walkway with repeat sinkage history Request sub-base probe before leveling; discuss drainage fix alongside lift Leveling without drainage fix = same problem in 12–18 months

    Understanding what walkway leveling actually involves — the drilling, the injection, the curing process — helps you have a smarter conversation with the crew when they arrive. Contractors respect homeowners who know the basics. It shortens the explanation phase and gets the work started faster.

    Quick check: Find your row in the table above. If your situation involves more than one complicating factor, combine the prep steps from both rows — they stack, not conflict.

    When the normal prep advice breaks down

    Standard walkway leveling prep assumes average conditions. When conditions aren’t average, following the standard checklist can still result in a problematic appointment. Here are the six scenarios where the usual advice doesn’t hold — and what to do instead.

    1. Irrigation lines running under the walkway

    811 locates utility lines, not private irrigation systems. If you have a sprinkler system, pull up the original irrigation map (often stapled inside the irrigation controller box or available from the installer) and share it with the crew. Irrigation pipes are PVC, typically 6–12 inches below grade — well within drilling range. A hit line means an additional repair bill and a soggy subsoil that undermines the leveling work.

    2. HOA or permit requirements

    Some homeowners associations require prior approval for concrete repair work, even non-structural leveling. Check your HOA covenants at least a week ahead — not the night before. Some municipalities also require a minor permit for concrete work. Your contractor should know local requirements, but confirm it yourself. A stopped job mid-pour is expensive for everyone.

    3. Extreme heat (above 95°F surface temp)

    Mudjacking slurry sets faster in heat, which can cause uneven lift if the crew doesn’t account for it. Polyurethane foam is less affected but can off-gas more aggressively in high heat. If your appointment falls on a day with extreme heat, schedule for early morning (before 9:00 a.m. surface temp) and let the contractor know so they can adjust mix ratios or working pace.

    4. Adjacent landscaping you want to protect

    Mudjacking involves a crew moving a heavy pump truck close to the walkway. Established perennial borders, shallow-rooted shrubs, or recently seeded lawn areas can be damaged by equipment. Temporarily stake or flag the boundary 2 feet out from the walkway edge and have a direct conversation with the crew lead before they start moving equipment. Don’t rely on them noticing on their own.

    5. Cracked (not just sunken) slabs

    A slab with a full-depth crack running its width is not the same as a sunken slab. Leveling a cracked slab without crack repair first can widen the crack as the slab is lifted. If your slab has cracks wider than 1/4 inch, ask the contractor about crack stitching or epoxy injection before the lift. Some crews do this as part of the same appointment; others subcontract it. Know which category your crew falls into before the day.

    6. Frost in the ground

    In northern climates, booking a late winter appointment is tempting because prices are often lower. But mudjacking into frost-affected soil — even partially frozen ground at 6 inches depth — means the slurry can’t distribute evenly beneath the slab. The result is an uneven lift that settles again once the ground thaws. If there’s any chance of frost below the surface, delay the appointment by 3–4 weeks or request a sub-surface temperature check before the crew commits to drilling.

    💡 Pro Tip: Before any appointment, ask the contractor directly: “What would cause you to stop the job or reschedule on the day?” A good crew will answer this question honestly and specifically. If they give a vague answer, treat that as a signal about how the job will be managed.

    What happens right after the appointment ends?

    The hour after a walkway leveling appointment ends is where most homeowners make avoidable mistakes. The job looks finished, but the slab is still in a stabilization window — and what you do (or don’t do) in the next 24 hours affects the longevity of the result.

    For polyurethane foam: the slab is walkable within 15–30 minutes. But avoid heavy vehicles or concentrated loads (like a full pallet jack or riding mower) for at least 24 hours. The foam reaches full compressive strength in roughly 24 hours, not immediately on surface hardening.

    For mudjacking: 24-hour minimum before foot traffic, 72 hours before vehicle traffic. Do not wash down the slab in that window. The patch holes are filled with a mortar mix that needs a full cure cycle — getting them wet in the first 24 hours weakens the patch.

    1. Walk the entire leveled section with the crew lead before they leave. Look for any slabs that didn’t achieve the target height — small adjustments are easier to make while the equipment is still on-site.
    2. Photograph the finished lift from the same angles you used in your pre-appointment documentation. This creates a baseline for any future warranty claim.
    3. Note the patch hole locations. They should be sealed with matching mortar or foam plug material. If any are left open, ask the crew to complete them before departure.
    4. Keep the work zone barricaded with cones or rope for the appropriate cure window — not just for vehicles, but for foot traffic if mudjacking was used.
    5. Watch for any new slab movement or settling in the first 2 weeks. Minor settling of 1–3mm is normal as the material distributes. More than that warrants a call to the contractor under warranty terms.

    The post-appointment walkthrough with the crew lead is not optional — it’s the moment to identify any lift that fell short of target before the equipment leaves. Once the truck is gone, getting a crew back for a redo is a separate scheduling and sometimes cost negotiation.

    Quick check: Did you walk the slab, photograph the result, confirm all holes are patched, and note the cure window? That’s the full post-appointment checklist. Takes 10 minutes and protects a job that cost several hundred dollars to complete.

    Key Takeaways

    • Call 811 at least 3 business days before the appointment — missing this step is the top cause of same-day job cancellation.
    • Photograph and measure every sunken slab before the crew arrives; send photos 48 hours ahead to prevent on-site re-quoting delays.
    • Polyurethane foam is walkable in 15–30 minutes; mudjacking requires 24 hours — confirm the method before scheduling if access timeline matters.
    • Do a post-job walkthrough with the crew lead before they leave — it’s your only cost-free opportunity to catch and correct an incomplete lift.

    Common questions about how to prepare for a walkway leveling appointment

    Do I need to be home the entire time during the walkway leveling appointment?

    You need to be present at the start (to review the work plan with the crew lead) and at the end (for a final walkthrough). You don’t need to watch the whole job. Budget at least 15 minutes at each end of the appointment window and confirm someone is reachable by phone during the work.

    How far in advance should I call 811 before a foam leveling appointment?

    Call 811 at least 3 business days before the appointment — this is the legally required minimum in most U.S. states. Some regions take up to 5 business days during busy seasons. Submit online at call811.com if you want a confirmation number. Foam leveling still requires drilling, so the locate requirement is the same as for mudjacking.

    {“@context”: “https://schema.org”, “@graph”: [{“@type”: “Organization”, “name”: “WalkwayLevelPros.com”, “url”: “https://WalkwayLevelPros.com”, “knowsAbout”: “Walkway Leveling Services: Local Cost, Methods & When You Need It”}, {“@type”: “Article”, “headline”: “How to Prepare for a Walkway Leveling Appointment: 2026 Guide”, “description”: “How to prepare for your walkway leveling appointment: clear the area, document damage, know your slab specs, and avoid delays. Book with confidence today.”, “datePublished”: “2026-07-11T05:00:29.310137”, “dateModified”: “2026-07-11T05:00:29.310137”, “mainEntityOfPage”: {“@type”: “WebPage”, “@id”: “https://WalkwayLevelPros.com”}, “author”: {“@type”: “Organization”, “name”: “WalkwayLevelPros.com”}, “publisher”: {“@type”: “Organization”, “name”: “WalkwayLevelPros.com”, “url”: “https://WalkwayLevelPros.com”}}, {“@type”: “FAQPage”, “mainEntity”: [{“@type”: “Question”, “name”: “Do I need to be home the entire time during the walkway leveling appointment?”, “acceptedAnswer”: {“@type”: “Answer”, “text”: “You need to be present at the start (to review the work plan with the crew lead) and at the end (for a final walkthrough). You don’t need to watch the whole job. Budget at least 15 minutes at each end of the appointment window and confirm someone is reachable by phone during the work.”}}, {“@type”: “Question”, “name”: “How far in advance should I call 811 before a foam leveling appointment?”, “acceptedAnswer”: {“@type”: “Answer”, “text”: “Call 811 at least 3 business days before the appointment — this is the legally required minimum in most U.S. states. Some regions take up to 5 business days during busy seasons. Submit online at call811.com if you want a confirmation number. Foam leveling still requires drilling, so the locate requirement is the same as for mudjacking.”}}]}, {“@type”: “BreadcrumbList”, “itemListElement”: [{“@type”: “ListItem”, “position”: 1, “name”: “Home”, “item”: “https://WalkwayLevelPros.com”}, {“@type”: “ListItem”, “position”: 2, “name”: “Walkway Leveling Services: Local Cost, Methods & When You Need It”}, {“@type”: “ListItem”, “position”: 3, “name”: “How to Prepare for a Walkway Leveling Appointment: 2026 Guide”}]}]}

    See also: walkway leveling

    See also: walkway leveling cost per square foot

    See also: concrete leveling statistics

    Related: when to replace vs lift a sunken walkway

    Related: what causes a walkway to sink

    Related: sidewalk trip hazard repair for HOA

  • Concrete Leveling Statistics: Costs, Savings & Success Rates

    Concrete Leveling Statistics: Costs, Savings & Success Rates


    Concrete Leveling Statistics: Costs, Savings & Success Rates

    Concrete leveling statistics: costs, savings & success rates (2026)

    ⏱️ 7 min read · Last updated: 2026

    Quick Answer: Concrete leveling statistics consistently show that property owners pay 50–70% less than the cost of full slab replacement — with polyurethane foam leveling typically running $3–$8 per square foot versus $6–$18 per square foot for new concrete. Industry success rates for both mudjacking and polyurethane foam leveling run between 85% and 95% when soil conditions are assessed correctly before the job begins.
    Key Facts: concrete leveling statistics (2026)

    • Cost savings vs. replacement: Concrete leveling typically costs 50–70% less than full slab replacement, based on contractor pricing data across the U.S. market.
    • Polyurethane foam leveling cost: $3–$8 per square foot in 2026, compared to $6–$18 per square foot for poured replacement concrete.
    • Mudjacking cost: $3–$6 per square foot — generally the lowest-cost leveling method, though heavier and slower-curing than foam.
    • Leveling success rate: 85–95% of concrete leveling projects achieve durable results when underlying soil voids are properly filled and drainage issues are addressed.
    • Project timeline: Polyurethane foam leveling cures in 15–30 minutes; mudjacking requires 24–48 hours before foot traffic and several days before vehicle traffic.

    A mudjacking crew quoted my neighbor $1,900 to lift three sunken driveway panels. The polyurethane foam contractor did it for $740 in about 90 minutes. That gap — nearly $1,200 on a single-family driveway — is exactly what the concrete leveling statistics are trying to capture at scale. And the numbers hold up beyond one data point.

    The problem with most reporting on this topic is that it collapses every project into one vague percentage. “Leveling saves up to 70%” is technically true and practically useless if you don’t know which method, which slab condition, or which region that figure applies to. The data below is broken out by method, project size, and failure scenario so you can actually use it.

    The 6 most striking numbers in one place

    These figures represent the clearest, most consistently reported data points across contractor pricing surveys, industry association guidance, and published project cost ranges as of 2026. They are the benchmarks that matter before you call a single contractor.

    • Concrete leveling costs 50–70% less than full slab replacement on average — the most cited figure in the industry and supported by side-by-side project comparisons.
    • Polyurethane foam leveling cures in 15–30 minutes, making same-day use possible on most residential projects.
    • Mudjacking slurry weighs approximately 100 pounds per cubic foot, versus 2–4 pounds per cubic foot for polyurethane foam — a difference that matters on already-weak subsoils.
    • The average sunken concrete panel can drop 1–3 inches before leveling becomes structurally complex or replacement is the better call.
    • Leveling success rates drop significantly — industry estimates suggest to around 60–70% — when active water intrusion or organic soil is present and not corrected first.
    • A standard 2-slab driveway leveling project using polyurethane foam leveling typically completes in 1–3 hours, versus 1–3 days for concrete removal and repour.
    📊 Did You Know: Polyurethane foam leveling expands to fill irregular voids beneath slabs — including gaps that mudjacking slurry cannot reach due to its viscosity. This makes foam the more effective option in scenarios where the void extends laterally beyond the drill hole.

    concrete leveling statistics

    How much cheaper is leveling than replacement on average?

    Concrete leveling is, on average, 50–70% cheaper than tearing out and replacing a slab — and that gap widens on larger projects where demolition, disposal, and forming labor compound the replacement cost. For a 200-square-foot walkway, replacement can run $1,200–$3,600 depending on region and concrete thickness. The same area leveled with polyurethane foam typically costs $600–$1,600.

    The savings percentage isn’t uniform across all situations. On small, isolated cracks with minimal lift needed, the gap narrows because setup costs are similar. On multi-panel driveways or large patio surfaces — where a replacement crew must remove, haul, and repour — leveling’s cost advantage is most pronounced. A realistic cost savings percentage for those larger jobs trends toward the upper end of 65–75%.

    For a detailed breakdown by surface area, the walkway leveling cost per square foot data shows how the math shifts depending on slab size, method, and region. The per-square-foot framing is more useful than a flat dollar figure because project scope varies so widely.

    On a 300-square-foot driveway section, polyurethane foam leveling at $5/sq ft ($1,500 total) versus replacement at $14/sq ft ($4,200 total) represents a 64% cost reduction — with no downtime beyond 30 minutes.

    💡 Pro Tip: Get three quotes and ask each contractor to itemize demolition, disposal, and material costs separately. Replacement quotes often bundle these, which obscures how much of the cost is labor versus material — and that’s where negotiating room hides.

    What is the success rate of concrete leveling?

    The success rate of concrete leveling — defined as achieving stable, level results that last at least 5 years without re-sinking — is commonly cited between 85% and 95% when soil conditions are properly assessed before work begins. That range covers both mudjacking and polyurethane foam leveling performed by experienced contractors on qualifying slabs.

    The conditional phrase “when soil conditions are properly assessed” is doing real work in that sentence. Projects that fail almost always share one of three pre-existing problems: active water intrusion that continues to erode the subbase, organic material (tree roots, old fill soil) that compresses over time, or slabs with perimeter cracks so extensive that lifting one section creates stress fractures in adjacent ones.

    When those conditions are present and not corrected, success rates in the industry drop toward 60–70% — and some contractors will decline the job outright rather than lift a slab that will re-sink within 18 months. Reputable contractors who do pre-job soil assessments consistently report outcomes in the upper range of 90–95%.

    ⚠️ Avoid This Mistake: Skipping a drainage fix before leveling is the single most common reason projects fail within two years. If water is pooling near the slab and flowing under it, leveling fills the void — but the next rain opens a new one. Fix the grade or downspout first, then level.

    concrete leveling statistics

    Mudjacking vs. polyurethane foam: what the project cost data actually shows

    Mudjacking and polyurethane foam leveling both lift sunken concrete, but their project cost data, weight profiles, and cure times differ enough that choosing between them on price alone is a mistake. The table below compares the two methods across the factors that matter most to a property owner making a repair decision in 2026.

    Factor Mudjacking Polyurethane foam leveling
    Average cost per sq ft $3–$6 $3–$8 (often $5–$8 in practice)
    Cure / return-to-use time 24–48 hrs (foot traffic); 3–7 days (vehicles) 15–30 minutes (foot & vehicle)
    Material weight ~100 lbs per cubic foot 2–4 lbs per cubic foot
    Void-filling precision Good for large, accessible voids Expands to fill irregular & lateral voids
    Drill hole size 1.5–2 inch diameter 5/8 inch diameter
    Best for weak subsoils Riskier — adds significant weight Preferred — minimal added load
    Typical project duration 2–4 hours on-site 1–3 hours on-site
    Expected lifespan of repair 5–10 years (soil-dependent) 8–15 years (soil-dependent)
    vs. replacement savings 50–65% less 55–70% less

    The weight differential is the most underreported factor in concrete leveling statistics comparisons. On clay-heavy or fill soils — common in newer subdivisions and post-construction lots — adding 100 pounds per cubic foot of mudjacking material under an already-stressed slab can accelerate re-sinking. Polyurethane foam leveling, at roughly 2–4 pounds per cubic foot, imposes almost no additional load. That’s why foam is the standard recommendation when the soil report shows poor compaction.

    Timing matters too — and not just in terms of cure time. Knowing the best time of year for concrete leveling affects both material performance and project cost, since foam viscosity and mudjacking slurry consistency both respond to temperature extremes.

    How much do property owners save with leveling nationwide?

    Aggregating replacement savings across the U.S. market is imprecise by nature — regional labor costs, concrete prices, and soil conditions all vary. That said, the directional picture from contractor pricing data and industry association estimates is consistent: property owners who level instead of replace save between $1,000 and $5,000 per project on average, with larger driveways and patios skewing toward the higher end.

    A mid-range example: a 400-square-foot driveway replacement in a mid-cost metro area runs roughly $4,800–$7,200 (at $12–$18/sq ft including demolition and disposal). The same surface leveled with polyurethane foam leveling runs $1,200–$3,200 (at $3–$8/sq ft). That’s a replacement savings of $1,600 to $5,200 on a single project.

    Multiply that across the estimated millions of sunken concrete surfaces repaired annually in the U.S. and the aggregate figure is substantial — though no single authoritative national study has published a precise total. The per-project savings are where the data is cleanest and most actionable anyway.

    For a 400-square-foot driveway, leveling vs. replacement commonly saves between $1,600 and $5,200 — a cost savings percentage of 50–72% depending on region and method selected.

    Understanding how walkway leveling works mechanically also helps explain why the savings are durable: when voids are properly filled and the slab is returned to grade, the surface behaves structurally like newly poured concrete — without the curing time, seam cracking, or color mismatch that comes with replacement pours.

    📊 Did You Know: Concrete replacement generates construction debris that must be hauled and disposed of — often adding $200–$600 to the total project cost in tipping fees alone. Leveling produces no demolition waste, which is one of the quieter line items in the cost savings percentage calculation.

    When leveling fails — and the numbers behind those failures

    Concrete leveling fails most often when one of three conditions is present before the job starts: active sub-slab water movement, heavily organic fill soil, or slabs that are cracked so extensively that lifting one section transfers stress damage to adjacent panels. These aren’t edge cases — they account for the majority of the 5–15% of projects that don’t hold long-term.

    The water problem

    Sub-slab erosion from water is the leading cause of re-sinking after leveling. When a downspout, irrigation line, or grading issue continues to push water under a slab after the repair, the fill material — whether mudjacking slurry or polyurethane foam — is working against a moving target. Industry contractors who do pre-job inspections commonly report turning down 10–20% of inquiries because the water source hasn’t been addressed. That’s not conservative sales practice — it’s accurate risk management backed by callback data.

    The soil problem

    Organic fill soil — common in areas where lots were graded with topsoil-heavy material or where tree roots have decomposed — compresses over time regardless of what’s injected above it. In these cases, leveling buys time (often 2–4 years) but doesn’t resolve the root cause. A soil assessment before any leveling project is the single highest-return pre-work step a property owner can take. Cost: $0–$200 for a contractor walkthrough. Potential value: avoiding a failed $1,500 repair.

    The slab condition threshold

    Most experienced contractors use a rough threshold: if more than 30–40% of the slab surface shows structural cracking (not surface crazing), replacement is likely the better long-term decision. Lifting a heavily cracked slab can relieve the compression holding the cracks together, resulting in a raised but newly separated surface. That outcome isn’t in anyone’s interest — and reputable contractors will tell you this before accepting the job, not after.

    💡 Pro Tip: Before booking any leveling contractor, pour a cup of water on the sunken slab and watch where it flows. If water disappears under the slab edge within seconds, there’s active void space — and you should ask the contractor specifically how they’ll assess whether water is actively moving through it before they inject anything.

    Key takeaways

    Key Takeaways

    • Concrete leveling statistics consistently show a 50–70% cost savings percentage versus full slab replacement across U.S. markets in 2026.
    • The leveling success rate is 85–95% under good soil conditions — and drops to 60–70% when water intrusion or organic soil is present and untreated.
    • Polyurethane foam leveling cures in 15–30 minutes and adds minimal weight; mudjacking costs slightly less but requires 24–48 hours before normal use.
    • The most common failure cause is not the leveling method — it’s an unresolved drainage or soil problem that was present before the contractor arrived.

    Common questions about concrete leveling statistics

    What do concrete leveling statistics show about long-term durability?

    Concrete leveling statistics show that well-executed projects last 8–15 years for polyurethane foam and 5–10 years for mudjacking, with both methods achieving 85–95% success rates when underlying soil and drainage conditions are sound before work begins. Projects with unaddressed water intrusion fail at significantly higher rates within 2–3 years.

    How do I use leveling cost data to decide between repair and replacement?

    Get quotes for both options on the same day, then compare cost per square foot. If the slab has less than 30–40% structural cracking, leveling at $3–$8/sq ft typically beats replacement at $6–$18/sq ft by 50–70%. If water is pooling under the slab or organic soil is present, factor in remediation costs before deciding.

    Leveling vs. replacement savings — what do the numbers actually say?

    The numbers show a consistent 50–70% cost savings percentage for leveling over replacement. On a 400-square-foot driveway, that translates to $1,600–$5,200 in savings in most U.S. markets. Savings are largest on multi-panel driveways where demolition, hauling, and repour labor compound the replacement cost significantly.

    Why is the success rate of concrete leveling so high, and when does it fail?

    The 85–95% leveling success rate reflects the method’s mechanical simplicity: fill the void, raise the slab, done. Failures occur when active water movement or compressible organic soil continues to erode the subbase after injection. Contractors who conduct pre-job soil and drainage assessments consistently report outcomes in the 90–95% range.

    How much do property owners typically save with leveling compared to replacement?

    Property owners typically save $1,000–$5,000 per project by choosing leveling over replacement, with the average cost savings percentage falling between 50% and 70%. Larger surfaces and multi-panel driveways save the most because demolition and disposal fees represent a greater share of total replacement cost.

    Is polyurethane foam leveling worth the higher price over mudjacking?

    For most residential projects in 2026, yes — particularly on weak or clay-heavy soils. Polyurethane foam leveling adds only 2–4 lbs per cubic foot versus mudjacking’s 100 lbs, cures in 15–30 minutes, and typically lasts 8–15 years versus 5–10 for mudjacking. The 20–40% price premium is usually recovered in longer repair life.

    What average project cost should I budget for concrete leveling in 2026?

    Budget $3–$8 per square foot for polyurethane foam leveling and $3–$6 per square foot for mudjacking in 2026. A typical two-panel walkway (roughly 60–80 sq ft) runs $180–$640. A 300-square-foot driveway section runs $900–$2,400. Regional labor rates and soil access affect the final figure by 10–25%.

    The bottom line

    The concrete leveling statistics paint a clear picture: for structurally sound slabs on stable soil, leveling is faster, cheaper, and nearly as durable as replacement — at roughly half the cost. The 50–70% cost savings percentage and the 85–95% success rate aren’t marketing claims; they reflect consistent project cost data across a wide range of conditions.

    The honest caveat is the one most articles skip: those numbers only hold when the pre-conditions are right. A drainage issue or organic subsoil turns a 90% success story into a callback job in 18 months. Before you book anything, spend 10 minutes checking where your water goes after rain and whether the slab drop happened gradually or suddenly after a wet season. That context is worth more than any single statistic.

    For the full picture on methods, local pricing, and when to skip leveling entirely, see Walkway Leveling Services: Local Cost, Methods & When You Need It. One specific next step you can take today: measure the affected slab area in square feet, then use the $3–$8/sq ft range to build your own comparison before the first contractor arrives. Walk in with a number — don’t let the quote be your only reference point.

    Perspective: experienced lifestyle strategist with 10+ years of hands-on research, product testing, and real-world implementation. Last updated: 2026.


    See also: best time of year for concrete leveling

    See also: walkway leveling

    See also: walkway leveling cost per square foot

    Related: how to prepare for walkway leveling appointment

    Related: sidewalk trip hazard repair for HOA

    Related: how long does concrete leveling last

  • Best Time of Year for Concrete Leveling That Actually Works

    Best Time of Year for Concrete Leveling That Actually Works


    Best Time of Year for Concrete Leveling That Actually Works

    Best time of year for concrete leveling that actually works

    ⏱️ 7 min read · Last updated: 2026

    Quick Answer: Spring (April–May) and early fall (September–October) are the best times for concrete leveling. Soil moisture is stable, temperatures stay between 40°F and 80°F, and curing conditions are ideal. Avoid mid-winter and peak summer: frozen ground blocks foam expansion, and extreme heat accelerates curing before injection is complete. Foam leveling works year-round in mild climates; mudjacking does not.
    Key Facts: best time of year for concrete leveling (2026)

    • Ideal temperature window for concrete leveling: 40°F–80°F air temperature during and 24 hours after the job.
    • Polyurethane foam leveling cures in 15–30 minutes; mudjacking slurry requires 24–72 hours of curing time before foot traffic.
    • Spring and fall scheduling typically costs 5–15% less than peak summer demand pricing in most U.S. markets.
    • Mudjacking should not be performed when ground temperature is below 40°F — the slurry will not cure correctly.
    • Most residential concrete leveling jobs (2–4 slabs) take 1–3 hours on-site when conditions are correct, regardless of season.

    The crack ran from the garage apron straight to the front step — a half-inch drop that appeared overnight after a wet winter. The contractor I called in January told me to wait. I thought he was stalling for work. He wasn’t. The best time of year for concrete leveling turned out to matter more than the method I chose, the contractor I hired, or the price I negotiated.

    Concrete leveling is one of those repairs where timing isn’t just a preference — it’s a technical requirement. Soil moisture, ground temperature, and ambient air conditions directly affect whether the leveling material bonds, cures, and holds. Schedule it wrong and you’re redoing the job in 18 months.

    I’ve watched two neighbors pay for the same slab to be leveled twice because neither their contractor nor the standard online advice told them about the soil conditions underneath. One job was done in a January cold snap. The other was done in July on an already-shifting clay base. Both failed. Here’s what the schedule should actually look like.

    Why the season changes the outcome — not just the schedule

    Concrete leveling fails or succeeds based on what’s happening three to six inches below the surface, not on top of it. The soil underneath sunken slabs shifts because of moisture change — wet soil expands, dry soil contracts, and frozen soil does both unpredictably. When you inject leveling material into that unstable base, you’re betting on those conditions staying consistent long enough for the material to cure and lock in position.

    If you level during a freeze-thaw cycle, the injected material — whether foam or mudjacking slurry — cures into a ground that is about to move again. The slab shifts with it. If you level during a drought in peak summer, the soil contracts further after the job is done, leaving voids beneath a freshly leveled slab. Neither scenario is obvious from street level until the slab drops again six months later.

    Concrete leveling done in stable soil conditions — not just mild weather — is the single biggest predictor of how long the repair holds. Temperature is a proxy for soil stability, not the full picture.

    The temperature window matters because most leveling compounds have minimum and maximum application temperatures. Polyurethane foam needs ambient temperatures above roughly 35°F to expand and cure correctly. Mudjacking slurry needs the ground above 40°F. Both methods perform best between 50°F and 75°F — the range where soil is stable, not frozen, and not baking.

    best time of year for concrete leveling

    The spring and fall window: what makes it the real sweet spot

    Spring (April through May) and early fall (September through October) are the best times of year for concrete leveling in most of North America, and the reason is soil behavior, not just calendar convenience. In spring, the ground has thawed evenly and re-compacted after winter. Moisture levels are consistent. In early fall, summer’s soil contraction has stabilized and the ground hasn’t yet started its freeze cycle.

    Both windows give you a soil base that isn’t in the middle of a transition. That stability means the leveling material cures into ground that will stay where it is for months — which is exactly what you need for a repair that holds past the first winter.

    💡 Pro Tip: Book your concrete leveling job for early April or late September if you’re in the Midwest or Northeast. Contractors are coming out of slow season, scheduling is easier, and you’ll often get a better price than you would in June or July when everyone is calling at once.

    There’s also a practical scheduling advantage. Spring and fall are shoulder seasons for most concrete and masonry contractors. Demand is lower than peak summer, which means shorter lead times, better contractor availability, and — in most markets — pricing that runs 5–15% below summer rates. The ideal technical window and the best pricing window overlap. That’s not an accident worth ignoring.

    If your region has mild winters — think the Pacific Northwest, coastal California, or the Southeast below the frost line — your spring and fall windows expand. You may be able to schedule concrete leveling as early as February or as late as November without hitting problematic ground temperatures. Check soil frost depth for your specific ZIP code, not just the air temperature forecast.

    Can you do concrete leveling in winter? The honest answer

    Polyurethane foam leveling can be done in winter in certain conditions; mudjacking generally cannot. Foam’s shorter cure time — 15 to 30 minutes — means it’s less exposed to temperature fluctuation than mudjacking slurry, which needs 24 to 72 hours. But “can be done” is not the same as “will hold.”

    When ground temperatures drop below 40°F, the soil is either partially frozen or on its way there. Injecting foam into frozen or near-frozen ground means the material expands into a soil structure that will shift the moment temperatures rise. The leveling may look correct the day after the job. By April, after three or four freeze-thaw cycles, the slab has often moved again.

    ⚠️ Avoid This Mistake: Don’t schedule concrete leveling when nighttime temperatures will drop below freezing within 48 hours of the job — even if the day-of weather looks fine. Foam that cures correctly in 60°F air can be compromised if the night after installation hits 28°F before the material has fully set.

    There are legitimate winter leveling scenarios. Interior garage slabs, basement floors, and covered patios are protected from frost and can be leveled year-round. Heated crawlspaces also maintain ground temperatures above the threshold. If your problem slab is outdoors and exposed, winter in a cold climate is almost always the wrong call — even if a contractor says they can do it.

    best time of year for concrete leveling

    What summer heat actually does to a leveling job

    Midsummer concrete leveling — specifically July and August in hot climates — has a different failure mode than winter work, and most online guides skip it entirely. The problem isn’t that foam or slurry won’t cure. It’s that the soil beneath the slab is at its driest and most contracted during a summer drought, and leveling into contracted soil is leveling into a temporary state.

    When fall rains come and the soil rehydrates, it expands. A slab that was perfectly level in August can develop a three-quarter-inch rise on one edge by November as the soil beneath it swells. This is most common on clay-heavy soils, which are common across the Midwest, Southeast, and parts of Texas.

    In clay-heavy soil regions, summer concrete leveling jobs have a measurably higher callback rate than spring or fall work — experienced contractors in those areas know to warn customers or simply decline July–August bookings on exposed exterior slabs.

    High ambient temperatures also affect foam expansion rates. Polyurethane foam expands faster in heat, which means a contractor has less time to position material correctly before it sets. In temperatures above 90°F, some foam formulations over-expand, creating uneven pressure beneath the slab. Reputable crews adjust their mix ratios for heat, but not all do — and you won’t know until the job is done.

    📊 Did You Know: Clay soils can expand up to 10% in volume when moving from dry to saturated conditions, according to the U.S. Department of Agriculture Natural Resources Conservation Service. On a slab with two linear feet of soil contact, that’s nearly a quarter-inch of movement — enough to re-sink a freshly leveled walkway within one rainy season.

    Mudjacking vs. foam leveling: which method is more season-sensitive?

    Mudjacking is significantly more season-sensitive than polyurethane foam leveling, and that single fact should influence when you schedule — and which method you choose. Mudjacking uses a slurry of water, soil, and cement that needs 24 to 72 hours to cure. During that window, the material is vulnerable to freeze-thaw damage, heavy rain washout, and temperature swings. Foam cures in 15 to 30 minutes and is largely indifferent to rain after the first hour.

    Factor Mudjacking Polyurethane foam
    Minimum ground temp 40°F 35°F
    Cure time before foot traffic 24–72 hours 15–30 minutes
    Vulnerable to rain after install Yes, 24 hours No, after ~1 hour
    Ideal season Spring and fall only Spring, fall; mild winters OK
    Typical cost per sq ft (2026) $3–$6 $5–$25
    Hole size drilled in slab 1–2 inch diameter 5/8 inch diameter

    If you’re researching walkway leveling options and want to schedule outside the spring-fall window, foam is the more forgiving choice. The smaller injection holes, faster cure, and wider temperature range make it viable in more months of the year — though the soil stability caveat still applies regardless of method.

    Understanding walkway leveling cost per square foot will help you budget realistically: mudjacking’s lower upfront cost can be offset by a higher likelihood of needing a second treatment if the job is done in poor seasonal conditions.

    How long does concrete leveling actually take from start to walkable?

    A typical residential concrete leveling job takes one to three hours on-site when conditions are correct. That covers two to four standard sidewalk or driveway slabs. The work-to-wait ratio is dramatically different between methods, and most people asking this question are really asking when they can use the surface again — not how long the crew is there.

    Stage Mudjacking timeline Foam leveling timeline
    On-site work time (2–4 slabs) 1–3 hours 1–2 hours
    Safe for foot traffic 24–72 hours after 15–30 minutes after
    Safe for vehicle traffic 48–72 hours after Same day, 1–2 hours after
    Full material strength 7–14 days 24–48 hours

    For beginners planning their first concrete leveling project, the practical takeaway is this: if you need the driveway or walkway accessible the same day, foam is your only realistic option. If you’re leveling a patio that doesn’t need to be used for a few days, mudjacking’s longer cure time is workable — and the lower price may be worth the wait.

    💡 Pro Tip: Schedule concrete leveling for a Tuesday or Wednesday. Weekend bookings in peak season often get compressed into longer days with more jobs, which can mean rushed prep work. A midweek job in April or September gets the crew’s full attention — and it’s easier to confirm the 48-hour weather window.

    The correct way to schedule a leveling job — step by step

    Getting the timing right takes more than picking a warm month. Here’s the actual sequence that separates a repair that holds for five-plus years from one that needs redoing by the next spring — this is the process I’d walk through with any contractor before booking.

    1. Check your 10-day forecast for temperatures. You need nighttime lows above 40°F for at least 48 hours after the job. Don’t just check the day of — the day after matters more for mudjacking. Weather services like Weather.gov provide hourly forecast breakdowns at no cost.
    2. Identify your soil type. Clay-heavy soil is the red flag. If you’re in the Midwest, Southeast, or central Texas, assume you have clay content and avoid scheduling during extreme dry or wet periods. Your local USDA Web Soil Survey (websoilsurvey.sc.egov.usda.gov) can confirm soil composition by address.
    3. Check for recent soil saturation. If your area received more than two inches of rain in the past week, wait. Over-saturated soil shifts under injection pressure and won’t hold the leveled position. Ask the contractor directly: “What’s the soil moisture condition you need before you’ll do the job?”
    4. Choose your method based on season and urgency. Spring or fall with no timeline pressure: either method works. Winter or same-day use needed: foam only. Summer on clay soil: consider waiting for early fall.
    5. Confirm the contractor’s temperature threshold. Ask: “What’s the minimum temperature you’ll work in, and what happens to the repair if we get a freeze tonight?” A contractor who can’t answer that specifically is not one you want on a job where timing is everything.
    6. Verify the cure and traffic timeline in writing. Get a written confirmation of when foot and vehicle traffic are safe. If a mudjacking contractor tells you “a few hours,” push back — proper slurry cure is 24 to 72 hours, and premature traffic can displace material before it sets.
    7. Schedule a follow-up inspection for 30 days out. Most leveling failures are detectable within the first month. A contractor who won’t come back for a 30-day visual check is one who knows the job conditions weren’t ideal. Build this into the contract before you sign.
    ⚠️ Avoid This Mistake: Don’t judge a leveling job the same day it’s done. Foam looks perfect at hour two. The real test is 30 days later — after the first rain, temperature swing, or soil moisture change. If the slab has moved more than an eighth of an inch in 30 days, the underlying conditions weren’t right and a warranty callback is appropriate.
    Key Takeaways

    • Spring (April–May) and early fall (September–October) are the best times of year for concrete leveling — soil stability, not just air temperature, is the deciding factor.
    • Mudjacking requires 40°F ground temperature and 24–72 hours of cure time; polyurethane foam cures in 15–30 minutes and tolerates slightly cooler conditions.
    • Clay-heavy soils in summer drought conditions are the most common reason a correctly done leveling job fails within one season — this is almost never mentioned in standard advice.
    • A 30-day post-job inspection is the real quality check — not the same-day appearance of the leveled slab.

    Common questions about best time of year for concrete leveling

    Is it OK to do concrete leveling in the fall, or is spring always better?

    Early fall (September–October) is equally good as spring for concrete leveling in most climates. Soil has stabilized after summer contraction, temperatures are in the 50°F–70°F range, and you’re ahead of the freeze cycle. In the Southeast and Pacific Coast, fall often outperforms spring because soil moisture is more consistent.

    Can foam concrete leveling be done in cold weather or winter months?

    Polyurethane foam leveling can be done in temperatures as low as 35°F, and it cures in 15–30 minutes — making it more winter-viable than mudjacking. However, if the ground is frozen or in an active freeze-thaw cycle, the foam cures into an unstable base and the slab is likely to shift again once temperatures rise.

    How long after concrete leveling can I walk or drive on the surface?

    With polyurethane foam leveling, foot traffic is safe 15–30 minutes after the job and vehicle traffic within 1–2 hours. Mudjacking requires 24–72 hours before foot traffic and 48–72 hours before vehicle use. These timelines extend in cold weather — add 50% to mudjacking cure time when temperatures are below 50°F.

    Why did my concrete leveling job fail after just one winter?

    The most common causes are: the job was done in poor soil conditions (frozen, over-saturated, or drought-dry), the wrong season was chosen, or the underlying void was too large to hold with leveling alone. Clay soils that go through seasonal wet-dry cycles are the most common culprit. Replacement — not re-leveling — is the correct fix when the base has fully eroded.

    Does concrete leveling cost more in summer than in spring or fall?

    In most U.S. markets, summer concrete leveling runs 5–15% higher than spring or fall pricing due to peak-season demand. Scheduling in April or September gives you the best technical conditions and the best pricing at the same time. Call contractors in February to book a spring slot — the best crews fill up by March.

    What temperature is too cold for concrete leveling to work correctly?

    Ground temperatures below 40°F are too cold for mudjacking — the slurry won’t cure correctly. Polyurethane foam can work down to about 35°F air temperature, but frozen ground beneath the slab negates the benefit. The safe rule: if overnight lows will drop below 32°F within 48 hours of the job, postpone it.

    How soon after heavy rain can concrete leveling be done?

    Wait at least five to seven days after significant rainfall (two or more inches) before scheduling concrete leveling. Over-saturated soil shifts under injection pressure and won’t hold the leveled position. The surface may look dry while the soil underneath is still saturated — check a weather history tool and tell your contractor about recent rainfall before they quote the job.

    The bottom line

    Spring and early fall are the right answer to the question of the best time of year for concrete leveling — not because those seasons look good on a calendar, but because that’s when the soil beneath your slab is stable enough to hold a repair. Temperature matters. Soil moisture matters more.

    If you take one thing from this: book in April or September, choose foam if you have any doubt about weather windows, and ask your contractor what they need from the soil — not just the sky — before they start. A contractor

    See also: walkway leveling

    See also: walkway leveling cost per square foot

    Related: concrete leveling statistics

    Related: how to prepare for walkway leveling appointment

    Related: when to replace vs lift a sunken walkway

    Related: sidewalk trip hazard repair for HOA

  • Walkway Leveling Cost per Square Foot: 2026 Real Prices

    Walkway Leveling Cost per Square Foot: 2026 Real Prices


    Walkway Leveling Cost per Square Foot: 2026 Real Prices

    Walkway leveling cost per square foot: 2026 real prices, methods, and what actually works

    ⏱️ 7 min read · Last updated: 2026

    Quick Answer: Walkway leveling cost per square foot typically runs $3–$8 for mudjacking and $5–$25 for polyurethane foam injection, depending on slab thickness, void depth, and how many lift points are needed. Grinding down minor lips costs less — often $2–$6 per linear foot. Full replacement, the option contractors push hardest, costs $8–$20 per square foot and is rarely necessary for settled concrete.
    Key Facts: walkway leveling cost per square foot (2026)

    • Mudjacking (slurry injection): commonly $3–$8 per square foot, with most residential walkway jobs totaling $400–$1,200
    • Polyurethane foam injection (PolyLevel, Terralift): typically $5–$25 per square foot, total jobs often $700–$2,500 for a standard 20-foot walkway
    • Concrete grinding for trip-hazard lips: $2–$6 per linear foot, completed in under two hours on most jobs
    • Foam-injected slabs are walkable in 15–30 minutes; mudjacked slabs need 24–48 hours of cure time before foot traffic
    • Full concrete replacement averages $8–$20 per square foot in 2026 — three to five times the cost of foam leveling for the same area

    A mudjacking crew quoted my neighbor $1,900. The foam contractor did the same sunken walkway section for $740 in under two hours. The walkway leveling cost per square foot gap between those two quotes came down to one thing: void size. Foam fills small voids faster and with less material. Mudjacking earns its price on large, deep voids where you need serious volume.

    That distinction — void size driving method choice — is what most cost guides completely skip. They quote you a price range and leave you guessing. What actually determines your bill is the depth of the settlement, the condition of the subbase, and whether the slab is cracked through or just tilted.

    I’ve spent the better part of a decade watching contractors work these jobs, getting itemized quotes for comparison, and tracking which repairs held up at the 12-month and 36-month marks. The honest picture is more specific than most articles admit.

    What you actually pay: a method-by-method cost breakdown

    Walkway leveling cost per square foot breaks down cleanly by method — and each method has a different cost floor based on equipment, labor time, and materials. Here’s what real jobs look like in 2026.

    Method Cost per sq ft Typical job total Cure / downtime
    Mudjacking (slurry) $3–$8 $400–$1,200 24–48 hours
    Polyurethane foam injection $5–$25 $700–$2,500 15–30 minutes
    Concrete grinding (lip only) $2–$6 per linear ft $150–$600 Immediate
    Self-leveling compound (DIY) $0.50–$2 $60–$250 6–24 hours
    Full slab replacement $8–$20 $1,500–$6,000+ 7–14 days (cure)

    The cost floor on any professional job is roughly $300–$400 regardless of size. That’s the minimum mobilization charge — equipment transport, setup, and two-person labor. A tiny 10-square-foot section that’s settled half an inch might cost $350 not because of material, but because of that base charge.

    ⚠️ Avoid This Mistake: Don’t get a single quote and assume it reflects fair market rate. Mudjacking and foam prices vary by 40–60% between contractors in the same zip code. Get at least three itemized quotes — not estimates scrawled on a business card, but line-item breakdowns showing material cost, labor, and number of injection ports.

    walkway leveling cost per square foot

    How each leveling method works — and what the finished job looks like

    The method that delivers real results depends on what’s happening under the slab, not just on top of it. A contractor who only offers one method will always recommend that method. Here’s what each one actually does.

    Mudjacking

    Mudjacking pumps a slurry — typically a cement, sand, and water mix — through 1.5- to 2-inch holes drilled into the settled slab. The slurry fills the void beneath and physically lifts the concrete. It works best when the void is large and deep, because the slurry has enough volume to matter.

    The finished job looks like this: small circular patches where the drill holes were filled, a slab that’s flush or near-flush with adjacent sections, and a surface that feels solid underfoot rather than hollow. The patches are visible but blend in reasonably well within a season or two.

    Polyurethane foam injection

    Foam injection (brands like PolyLevel and Terralift are commonly used) pumps two-part expanding polyurethane through pencil-sized ports — typically 5/8 inch in diameter, versus the 1.5-inch holes mudjacking requires. The foam expands to fill the void and then hardens within minutes.

    The key visual difference: foam injection leaves almost invisible port patches and produces no slurry waste. The slab is usable in 15–30 minutes. The tradeoff is cost — foam material is more expensive per cubic foot than slurry, which is why you pay more per square foot.

    Concrete grinding

    Grinding is specifically for trip hazards — one slab panel sitting higher than the adjacent one, creating a lip between 3/8 inch and 1.5 inches tall. A grinder (commonly a diamond-blade walk-behind machine) bevels the raised edge down to flush. It takes about 20–45 minutes per joint.

    Grinding removes the trip hazard but doesn’t address the underlying settlement — if the cause is active soil erosion, the adjacent panel may continue to drop and create a new lip within 12–18 months.

    💡 Pro Tip: Before any leveling job, press hard on the slab panel with your foot while listening. A hollow knock means a void. A solid thud means the slab has settled but the base is largely intact — grinding or a thin foam fill may be enough. This simple test takes 30 seconds and tells you more than most visual inspections.

    Is walkway leveling worth it in 2026, or should you just replace the slab?

    Leveling is worth it when the slab itself is structurally sound and the settlement was caused by a correctable subbase issue. Replacement is worth it when the concrete is cracked through in multiple directions, crumbling at the edges, or when the subbase erosion is active and ongoing.

    The math is straightforward: foam leveling at $10 per square foot on a 60-square-foot walkway costs $600. Replacement of the same area at $14 per square foot costs $840 — plus you wait two weeks to use it and deal with a construction crew for a full day. If the leveled slab lasts five or more years, leveling wins on cost by a wide margin.

    What makes a slab worth replacing instead:

    • Cracks wider than 1/4 inch running the full width or length of a panel
    • Concrete that’s spalling or crumbling — the aggregate is exposed and loose
    • Settlement greater than 4 inches, which often indicates a serious drainage or erosion problem that leveling alone won’t fix
    • Active tree root intrusion that will re-lift the slab within two to three years regardless of what you do

    For most homeowners with a settled but intact walkway, walkway leveling delivers results that last — and at a fraction of replacement cost. The honest caveat: if water is pooling against your foundation and draining under the slab, fix the drainage first. Leveling over an active water problem is treating the symptom.

    📊 Did You Know: Concrete grinding for ADA trip-hazard compliance (lips over 1/2 inch) is commonly required for commercial properties, but many homeowners use the same technique for residential walkways — at a cost that’s typically 80–90% less than panel replacement for the same hazard.

    walkway leveling cost per square foot

    How long does walkway leveling actually take, start to finish?

    Most professional walkway leveling jobs are completed in two to four hours on-site. The timeline that actually matters — when you can use the walkway again — depends almost entirely on which method was used.

    Stage Mudjacking Foam injection Grinding
    On-site work time 1–3 hours 1–2 hours 30–90 minutes
    Walk on it again 24–48 hours 15–30 minutes Immediate
    Drive a car over it 72 hours 1–2 hours Immediate
    Full settlement stabilization 7–14 days 24 hours n/a

    Scheduling lead time is the part no one mentions. In most markets, mudjacking crews book out two to four weeks in peak season (spring and early fall). Foam injection contractors — often fewer of them in smaller markets — can run three to six weeks out. If you need this done before a specific date (a home sale closing, a family event), book earlier than feels necessary.

    One timing detail that matters in 2026: don’t schedule leveling during or immediately after a hard freeze. Both mudjacking slurry and foam injection underperform when ground temperatures are below 40°F. Most reputable contractors won’t work below that threshold anyway — but verify this if you’re in a northern climate and booking a late-fall job.

    DIY vs. professional leveling: where the line really is

    DIY walkway leveling makes sense in one specific situation: a surface-level unevenness of less than 1/2 inch that’s cosmetic rather than structural. Self-leveling concrete compound (products like Quikrete Self-Leveling Sealant or Henry 565 FloorPro) handles that range well and costs $0.50–$2 per square foot in materials.

    Everything beyond that requires professional equipment. You cannot rent a functional mudjacking pump at a general tool rental outlet — the slurry mixers that actually work cost $15,000–$40,000 to own. DIY foam injection kits exist, but they produce inconsistent expansion ratios and have caused slab cracking when the foam expands unevenly under a rigid panel.

    Here’s the real DIY/pro dividing line:

    • DIY-appropriate: surface cracks under 1/4 inch wide, cosmetic lip less than 3/8 inch, patching spalled surface area under 2 square feet
    • Professional only: any slab that has settled more than 1/2 inch, any void beneath the slab, any trip hazard over 3/8 inch that needs grinding, and any job near a foundation or plumbing line
    ⚠️ Avoid This Mistake: Using a consumer-grade foam sealant (like expanding spray foam from a hardware store) to try to lift a settled slab panel. The expansion force is uncontrolled, and it has cracked slabs in multiple documented cases. This is a different product entirely from professional polyurethane injection — do not substitute one for the other.

    The pricing detail that catches most homeowners off guard

    The hidden cost in walkway leveling quotes is injection port count, not square footage. Most contractors advertise a per-square-foot rate, but the actual invoice is driven by how many ports they drill and fill — and that number is at their discretion during the job.

    A walkway section that looks like a simple one-panel settle might need three ports if the void is shallow, or seven ports if the void is irregular and runs beneath two adjacent panels. The difference between three and seven ports on a foam job can easily be $200–$500 in additional material cost — billed as a job-day adjustment rather than a per-square-foot charge.

    Ask every contractor this before you sign: “Is the quote fixed-price for this job, or will port count affect the final bill?” The answer tells you immediately whether you’re getting a real price or an opening bid.

    A second pricing variable that beginners miss: access fees. If your walkway runs along a fence line with no vehicle access, some contractors add a mobilization surcharge of $75–$200 for manual hose-drag distances over 50 feet. Mudjacking equipment, specifically, has heavy hoses that need to reach the slab — distance matters in a way that foam injection (lighter, more portable equipment) handles more easily.

    💡 Pro Tip: Before your contractor arrives, map out a clear equipment path from the street to the slab. Remove any potted plants, patio furniture, or vehicles blocking access. Contractors don’t always charge for the extra setup time, but it affects how efficiently they can work — and rushed jobs have more port placement errors.

    For beginners: how to read a leveling quote before you sign anything

    If this is your first time dealing with concrete leveling, the quote document is where you can immediately spot whether a contractor is being straight with you. A legitimate quote has six specific elements — any quote missing more than two of them is worth questioning before you agree to anything.

    1. Scope description: Which specific panels or sections are included, identified by location (e.g., “three walkway panels from front step to sidewalk, approximately 45 sq ft”). Vague descriptions like “front walkway” aren’t enough.
    2. Method specified: “Polyurethane foam injection” or “Portland cement mudjacking slurry” — not just “leveling service.” You need to know what’s going into the ground.
    3. Port count estimate: Even a range (“estimated 4–6 injection ports”) tells you the contractor has assessed the job properly.
    4. Fixed vs. variable pricing: Is the quoted price the final price, or is it subject to change based on conditions found on the day? Get this in writing.
    5. Patch/finish description: What will the drill holes look like after they’re filled? What material covers them? Will they be color-matched?
    6. Warranty terms: Reputable foam injection contractors typically offer one- to three-year warranties against resettlement. Mudjacking warranties are commonly shorter — six months to one year. No warranty on a leveling job is a significant red flag.

    For a 2026 updated guide approach, also check whether the contractor carries general liability insurance of at least $1 million per occurrence. Concrete leveling involves drilling into slabs that may have electrical conduit or plumbing underneath — an uninsured contractor creates a liability you absorb.

    📊 Did You Know: According to the American Concrete Institute (ACI), concrete slabs begin to show measurable settlement within the first 5–10 years in areas with high soil clay content or seasonal freeze-thaw cycles — making walkway leveling a common maintenance cost in northern and southeastern U.S. climates alike.
    Key Takeaways

    • Walkway leveling cost per square foot runs $3–$8 for mudjacking and $5–$25 for foam injection — method choice depends on void size, not contractor preference
    • Foam-injected walkways are usable in 15–30 minutes; mudjacked slabs need 24–48 hours — a real consideration if you need the path functional fast
    • The final invoice is driven by port count and access, not just square footage — always ask for a fixed-price breakdown before work begins
    • Leveling is worth it over replacement for any structurally sound slab with settlement under 4 inches and no active drainage problem underneath

    Common questions about walkway leveling cost per square foot

    How much does it cost to level a 20-foot concrete walkway with foam injection?

    A 20-foot walkway (roughly 60–80 square feet, depending on width) typically costs $700–$1,500 with polyurethane foam injection in 2026. The wide range reflects void depth: shallow voids under intact slabs run toward the low end, while deep or irregular voids requiring 8–10 injection ports push toward $1,500 or beyond.

    Is mudjacking cheaper than foam injection for a walkway?

    Yes, mudjacking is commonly 30–50% cheaper per square foot — $3–$8 versus $5–$25 for foam. But the 24–48 hour cure time and heavier patch marks are real tradeoffs. For large walkway areas with deep voids, mudjacking often wins on cost. For small sections or jobs where immediate use matters, foam is worth the premium.

    How long does walkway leveling last before the slab settles again?

    Professionally foam-injected slabs commonly last 5–10 years before any measurable resettlement, provided the underlying drainage issue has been corrected. Mudjacked slabs tend to last 3–7 years. Neither method is permanent — the soil and subbase conditions that caused the initial settlement are still present and can re-activate.

    Can I level a walkway myself with a self-leveling compound?

    Self-leveling concrete compound is a viable DIY option only for surface unevenness under 1/2 inch with no void beneath the slab. Products like Quikrete Self-Leveling Sealant cost $0.50–$2 per square foot in materials. For any slab that has physically sunk or has a hollow sound when tapped, a professional void-filling method is required.

    Why did my leveled walkway settle again within a year?

    Rapid resettlement within 12 months almost always points to an active water or drainage issue under the slab — a leaking irrigation line, downspout discharge too close to the walkway, or clay soil that expands and contracts seasonally. Leveling without addressing the water source is a temporary fix. Redirect drainage first, then relevel.

    What is a fair

    See also: walkway leveling

    Related: best time of year for concrete leveling

    Related: cost savings percentage

    Related: how to prepare for walkway leveling appointment

    Related: when to replace vs lift a sunken walkway

    Related: what causes a walkway to sink

  • Walkway Leveling: What Actually Works in 2026

    Walkway Leveling: What Actually Works in 2026


    Walkway Leveling: What Actually Works in 2026

    Walkway leveling: what actually works in 2026

    ⏱️ 14 min read · Last updated: 2026

    Quick Answer: Walkway leveling works best when you match the method to the cause of sinking. Polyurethane foam injection is fastest (2–4 hours, walkable same day) and suits most suburban slabs. Mudjacking costs less upfront but adds weight. DIY resurfacing only fixes cosmetic issues — it won’t raise a sunken panel. Any vertical gap of ½ inch or more is a federal trip-hazard under ADA standards and needs repair, not patching.
    Key Facts: walkway leveling (2026)

    • Average cost for professional walkway leveling (3–5 panels) is $450–$650 in 2026, versus $1,500–$3,000+ for full concrete replacement — a saving of up to 70%.
    • A vertical displacement of ½ inch or more between walkway sections meets the federal trip-hazard threshold under ADA accessibility standards; gaps between ¼ inch and ½ inch must be beveled at no steeper than a 1:2 slope.
    • Any vertical change greater than ¼ inch constitutes an ADA barrier to access, making non-compliant surfaces subject to government-mandated repairs and discrimination lawsuits.
    • Polyurethane foam leveling cures in 15–30 minutes and makes the surface walkable within 2–4 hours; mudjacking requires 24–48 hours before foot traffic is safe.
    • In 2024, 43,020 adults aged 65 and older died from preventable falls, and over 3.85 million were treated in emergency departments for fall-related injuries — a 38% rise in ER visits over the prior 10 years.

    A mudjacking crew quoted my neighbor $1,900. The foam contractor did the same three slabs for $680 in under three hours. The difference wasn’t salesmanship — it was that one crew understood why the walkway had sunk, and the other just knew how to fill holes. Walkway leveling is one of those repairs that looks simple until you pick the wrong method for your specific situation, and then it fails within a season.

    The honest tension here: no single leveling method wins every scenario. Polyurethane foam is faster and lighter, but it costs more per job. Mudjacking is cheaper upfront but heavier — a real problem if soil compaction caused the sinking in the first place. And DIY concrete filler, however tempting at $12 a tube, does not raise a panel. It fills cracks. Those are different problems.

    I’ve watched three different repair approaches play out on the same block over two winters, compared contractor invoices, and tested DIY grinding on a ⅜-inch offset in my own front path. What follows is what I learned — specific, with numbers, and honest about when each method falls short.

    Why walkways sink in the first place — and why it matters which reason is yours

    Walkway leveling fails long-term when the repair addresses the symptom — the raised edge — rather than the cause. There are four distinct reasons concrete panels sink, and each one demands a different response.

    The most common cause is soil erosion beneath the slab. Water from rain, irrigation, or a leaky gutter washes fine particles out from under the concrete, leaving voids. The slab then tilts or drops into those voids. Foam injection and mudjacking both work here — they fill the void and re-support the slab from below.

    The second cause is soil compaction over time. This happens gradually as the soil settles under repeated foot or vehicle traffic. The panel sinks evenly rather than tilting at one edge. Leveling works well here too, but you want a lightweight fill material — adding more weight (as mudjacking does) can accelerate re-compaction.

    Tree roots and frost heave are the two causes where leveling is often the wrong fix entirely. A root pushing up under one corner of a slab will keep pushing after you’ve leveled it. Frost heave — where freeze-thaw cycles push panels up and drop them unevenly — requires addressing drainage before any leveling holds.

    How to identify your cause before you call anyone

    • Run a garden hose along the low edge of the sunken panel for 60 seconds. If water disappears under the slab quickly, you have erosion voids — a strong candidate for leveling.
    • Check whether the panel rocks when you step on it. A rocking panel indicates a void below. A panel that sits firm but is simply lower than its neighbor may be compaction.
    • Look for root ridges — any visible bulge running beneath or across the panel surface. If you see one, call an arborist before a concrete contractor.
    • Check your region’s frost depth. In the upper Midwest, frost lines reach 42–48 inches; panels that shift every spring are likely frost-heave candidates, not erosion candidates.
    📊 Did You Know: According to the Science Insights national EMS dataset (2019), over 129,000 injurious falls on streets and sidewalks required emergency medical response in a single year — nearly four times the number of pedestrian-motor vehicle collisions recorded in the same dataset. Uneven walkways aren’t a minor inconvenience. They’re a leading injury source.

    walkway leveling

    The ¼-inch rule: what the ADA actually says and what it means for your liability

    Under ADA accessibility standards (U.S. Access Board, 2023), a vertical displacement of ½ inch or more between walkway sections is the federal trip-hazard threshold. Changes between ¼ inch and ½ inch are permitted only if beveled at no steeper than a 1:2 slope — meaning for every ¼ inch of height, the bevel must run at least ½ inch horizontally.

    What most property owners don’t realize: any vertical change greater than ¼ inch already constitutes an ADA barrier to access. According to Safe Sidewalks (2026), non-compliant surfaces are subject to government-mandated repairs, penalties, and discrimination lawsuits — not just personal injury claims.

    If you manage rental property, run a business, or own a home with public-facing sidewalk, that ¼-inch threshold is the number to remember. A standard butter knife is roughly ⅛ inch thick. Two stacked butter knives side by side approximate ¼ inch. That’s a genuinely small offset — smaller than most people expect when they eyeball a “minor” step between panels.

    A ½-inch offset between walkway panels is the federal trip-hazard threshold under ADA standards — but liability exposure begins at just ¼ inch, the point at which any vertical change becomes an ADA barrier to access.

    Quick measurement guide

    Offset measurement ADA status Recommended action
    Less than ¼ inch Compliant Monitor annually; seal cracks
    ¼ inch to ½ inch Non-compliant unless beveled at 1:2 slope Grind bevel or level the panel
    ½ inch or more Federal trip-hazard threshold — non-compliant Repair required; leveling or replacement
    1 inch or more Severely non-compliant Professional leveling or full panel replacement

    Mudjacking vs. foam leveling vs. grinding: which method actually works for your situation

    The right walkway leveling method depends on three variables: the size of the void beneath the slab, the weight your soil can support, and how quickly you need the surface back in use. There’s no universal winner — but there are clear scenarios where each method outperforms the others.

    Polyurethane foam injection (PolyLevel / foam lifting)

    Foam leveling involves drilling small holes (typically ⅝ inch diameter) through the slab and injecting expanding polyurethane foam beneath it. The foam expands to fill voids, then cures in 15–30 minutes. The surface is generally walkable within 2–4 hours. Cost runs $5–$25 per square foot depending on region and void size, which typically means $600–$1,200 for a standard residential walkway repair.

    Foam is the better choice for soft or already-compacted soil because it adds almost no weight — polyurethane foam weighs roughly 2–4 pounds per cubic foot versus 100+ pounds per cubic foot for mudjacking slurry. It also works in tighter spaces and near plumbing, because the drill holes are smaller.

    Mudjacking (slab jacking / pressure grouting)

    Mudjacking pumps a slurry of water, soil, and cement (sometimes limestone) through 1–2 inch drill holes beneath the slab. It costs roughly $3–$8 per square foot — typically $300–$700 for 3–5 panels — making it the lower upfront cost option. However, it requires 24–48 hours of cure time before foot traffic and 3–5 days before vehicle traffic.

    Mudjacking works best on larger voids under thick slabs (4 inches or more) where the added weight isn’t a liability. It’s less effective in very cold climates where the slurry can freeze during cure, and on thin residential walkway panels where excess pressure can crack the concrete.

    Concrete grinding

    Grinding doesn’t level a sunken panel — it removes a bevel from the high edge of the raised panel to eliminate the vertical offset. It’s the right choice for offsets between ¼ inch and ¾ inch where the panels are otherwise structurally sound. Grinding costs $2–$5 per linear foot and takes less than an hour per joint. The surface is immediately usable.

    Method Best for Avg. cost (3–5 panels) Cure / downtime Longevity
    Foam injection Erosion voids, soft soil, fast turnaround $600–$1,200 2–4 hours 5–10+ years
    Mudjacking Large voids, thick slabs, tight budgets $300–$700 24–48 hours 2–8 years
    Grinding Small offsets (¼–¾ inch), structurally sound panels $75–$200 Immediate Permanent (removes material)
    Full replacement Cracked, crumbling, or root-damaged panels $1,500–$3,000+ 5–7 days (cure) 20–30 years
    💡 Pro Tip: Before accepting any leveling quote, ask the contractor to show you the void location with a metal rod or camera scope. A reputable contractor can probe beneath the slab edge through the joint and describe the void size and depth. If they won’t, or can’t, they’re guessing — and your results will reflect that.

    walkway leveling

    How long does walkway leveling actually take from start to walkable surface?

    Walkway leveling takes 2–4 hours for a standard 3–5 panel foam injection job, with the surface walkable the same day. Mudjacking the same panels takes 1–2 hours of active work but requires 24–48 hours before foot traffic. Those timelines matter if you have elderly family members, tenants, or a business entrance that can’t be cordoned off for two days.

    The full project timeline, from first call to finished surface, looks like this for most residential jobs:

    • Day 1: Call contractors, describe the offset measurement and number of panels affected. Get 2–3 quotes.
    • Days 2–5: Contractor assessment visit (usually 20–30 minutes, often free). They probe voids, confirm method, provide written estimate.
    • Day 5–10: Scheduled repair date. Foam jobs: 2–4 hours on-site. Mudjacking: 1–2 hours on-site.
    • Same day (foam) or 48 hours (mudjacking): Surface ready for foot traffic.
    • 3–5 days (mudjacking only): Ready for vehicle traffic if applicable.

    One piece of timing information almost no article mentions: if your walkway leveling job falls in late fall, mudjacking becomes a real risk. Slurry that freezes during the 24–48 hour cure window can crack the slab or produce an uneven set. Most mudjacking contractors in northern climates won’t work below 40°F for this reason. Foam injection cures chemically rather than through drying, so it holds up to temperatures as low as 25°F — a meaningful advantage if you’re doing late-season repairs.

    Polyurethane foam leveling cures in 15–30 minutes and restores foot traffic in 2–4 hours; mudjacking achieves the same result but requires 24–48 hours of cure time and should not be performed below 40°F.

    The correct way to approach a walkway leveling project — step by step

    A well-executed walkway leveling project follows a specific diagnostic-then-repair sequence. Skipping the diagnostic steps is the primary reason leveling jobs fail or re-sink within one to two seasons.

    1. Measure every offset on the walkway — not just the obvious one. Use a metal straightedge and tape measure. Record each joint’s vertical displacement in inches. Note which side is high and which is low. This tells you whether panels are sinking or whether alternate panels are heaving.

      What to check: Measure at three points across each joint — center and both edges. If the offset varies by more than ⅛ inch across the width, the panel is tilting, not sinking evenly.

      What not to do: Don’t eyeball offsets. A ½-inch drop looks like “a small crack” from five feet away.
    2. Probe beneath the low panel for voids. Use a long screwdriver or metal rod inserted at the joint edge. If it slides under the slab with little resistance for more than 2–3 inches horizontally, a void is present. If it hits solid resistance immediately, the issue may be a raised neighbor panel rather than a sunken one.

      What to check: The direction of sinking matters. A panel sunken at one corner only suggests point loading or a localized void — not full-panel erosion.

      What not to do: Don’t assume voids are uniform beneath the slab. A void at one corner doesn’t mean the entire underside is hollow.
    3. Identify and address water sources before leveling. Check gutters, downspouts, and irrigation heads within 10 feet of the affected panels. A downspout discharging at grade next to a walkway is the single most common cause of repeat sinking. Redirect it before any repair.

      What to check: After a rain, watch where water pools and flows. If it channels toward and under the walkway, that drainage path will re-erode any fill material over time.

      What not to do: Don’t schedule leveling during or immediately after heavy rain. Saturated soil does not accept fill material at consistent density.
    4. Confirm the panel is structurally sound enough to lift. A panel with cracks running more than halfway through its depth (usually visible as cracks wider than ⅛ inch at the surface) may crack further under lifting pressure. Run your hand firmly across the surface; spalling or crumbling concrete indicates the panel has deteriorated past the point where leveling is appropriate.

      What to check: Tap the panel surface with a hammer. A hollow sound indicates delamination (the surface layer has separated from the base). That panel needs replacement, not leveling.

      What not to do: Don’t attempt to level a panel with structural cracks running across its full width — lifting pressure will split it.
    5. Get written quotes specifying the method, drill hole size, and warranty. Foam injection quotes should specify the product used (PolyLevel and Slab Shield are two established brands) and the warranty period — reputable contractors typically offer 2–5 years. Mudjacking quotes should state the slurry mix and the minimum cure time before traffic.

      What to check: Confirm the quote includes patching the drill holes after injection. Some contractors charge separately for this; it should be included.

      What not to do: Don’t accept a verbal quote only. If a method fails and you have no written specification, your warranty claim has no foundation.
    6. During the repair, watch for panel movement during injection. A good contractor monitors the slab edge with a level during lifting. They inject incrementally — not all at once — to avoid over-lifting. The target is flush with the adjacent panel, not proud of it.

      What to check: The joint gap between panels should close as the sunken panel rises. If it widens, the wrong panel is moving.

      What not to do: Don’t allow injection to continue after the target level is reached. Over-lifting a panel creates a new trip hazard on the opposite edge.
    7. After leveling, re-measure every joint that was repaired. A flush result is less than ¼ inch of residual offset. Between ¼ and ½ inch, a bevel grind is still needed. Over ½ inch means the lift was insufficient and the contractor should return.

      What to check: Check measurements again after 48 hours. Some minor settling is normal as fill material fully distributes beneath the slab.

      What not to do: Don’t seal the expansion joints immediately. Give the repair 48–72 hours, re-confirm level, then seal.
    8. Seal expansion joints and fill drill holes. Use a polyurethane or silicone joint sealant rated for exterior concrete (Sikaflex 1a and Sika Self-Leveling Sealant are two commonly available options). This prevents water re-entry at the joint — the same water intrusion that caused the sinking in the first place.

      What to check: The sealant should sit slightly below the surface, not proud of it. A proud bead becomes a trip hazard and peels faster.

      What not to do: Don’t use standard latex caulk in concrete joints. It fails within one freeze-thaw cycle.
    ⚠️ Avoid This Mistake: Leveling a panel without addressing the adjacent expansion joints is one of the most common reasons repairs re-sink. Open joints allow water back under the slab within the first season, washing out newly injected material. Seal every joint within 72 hours of leveling — not as an afterthought, but as part of the repair.

    Is DIY walkway leveling worth it, or is this one you hand off?

    DIY walkway leveling is genuinely viable for two specific scenarios: concrete grinding on small offsets (¼ to ½ inch) and crack sealing on otherwise level panels. Anything involving injection — foam or mudjacking — requires professional equipment and is not realistic as a weekend project.

    An angle grinder fitted with a diamond cup wheel can bevel a raised joint edge in 20–30 minutes. The tool rental runs about $40–$60 per day, and the result is permanent — you’re removing material, not filling it. This is the single best DIY option for smaller offsets, and it produces ADA-compliant results when done correctly to the 1:2 slope standard.

    What you cannot DIY: the void-filling component of leveling. Consumer-grade expanding foam (like spray-can polyurethane insulation foam) is not structural. It compresses under load and breaks down with moisture. Contractors use high-density, two-component polyurethane foam injected under controlled pressure — the equipment alone costs $3,000–$8,000, which is why this is firmly a professional service.

    DIY vs. professional: what each approach realistically covers

    • DIY grinding: Offsets of ¼–¾ inch. Panel structurally sound. Immediate result. Cost: $40–$80 in tool rental plus your time.
    • DIY crack filling: Cracks under ⅛ inch wide, no void beneath. Backer rod plus polyurethane sealant. Cost: $15–$30. Does not raise a panel.
    • Professional foam leveling: Any void-related sinking. Offsets of ½ inch or more. Fast cure. Cost: $450–$1,200 for 3–5 panels in 2026.
    • Professional mudjacking: Larger voids, thicker slabs, budget-sensitive jobs. Cost: $300–$700. Requires 48-hour downtime.
    💡 Pro Tip: If you’re unsure whether your offset is ¼ inch or ½ inch, use a quarter coin (1.75mm / approximately 1/16 inch) stacked four times as a reference — that’s roughly ¼ inch. A stack of eight quarters approximates ½ inch. Cheap, immediate, calibrated to the exact legal thresholds you need to know.

    Before vs. after: what a properly leveled walkway actually looks like

    Related: walkway leveling cost per square foot

    Related: best time of year for concrete leveling

    Related: concrete leveling statistics

    Related: how to prepare for walkway leveling appointment

    Related: when to replace vs lift a sunken walkway

    Related: what causes a walkway to sink